Updated May 2021
 Installing a carseat involves knowing how your seat belt works and locks. Some seat belts only lock on quick maneuvering, sudden braking, or in a collision, some are locked all the time, and others are locked if the seat belt is at the correct angle against the carseat. You may need to lock your seat belt retractor or your carseat may have a built-in lockoff. This guide will provide you with the basic terminology of seat belts and help you figure out how to lock your seat belt on your child’s carseat to keep it tight. If you do need to use a locking clip—which is fortunately rare now—step-by-step instructions with pictures and a video follow at the end of the page.
It is important to know that ALL model year 1996 and newer vehicles have seat belts that lock for carseats in one of two ways: either at the retractor or at the latchplate. You’ll learn everything you need to know about those items below.
I’m constantly looking for ways to improve this website and make the information easier to understand. I’ve created this video which covers some of what’s found on this page. This page is still the complete source for seat belt information!
Basic Terms to Know
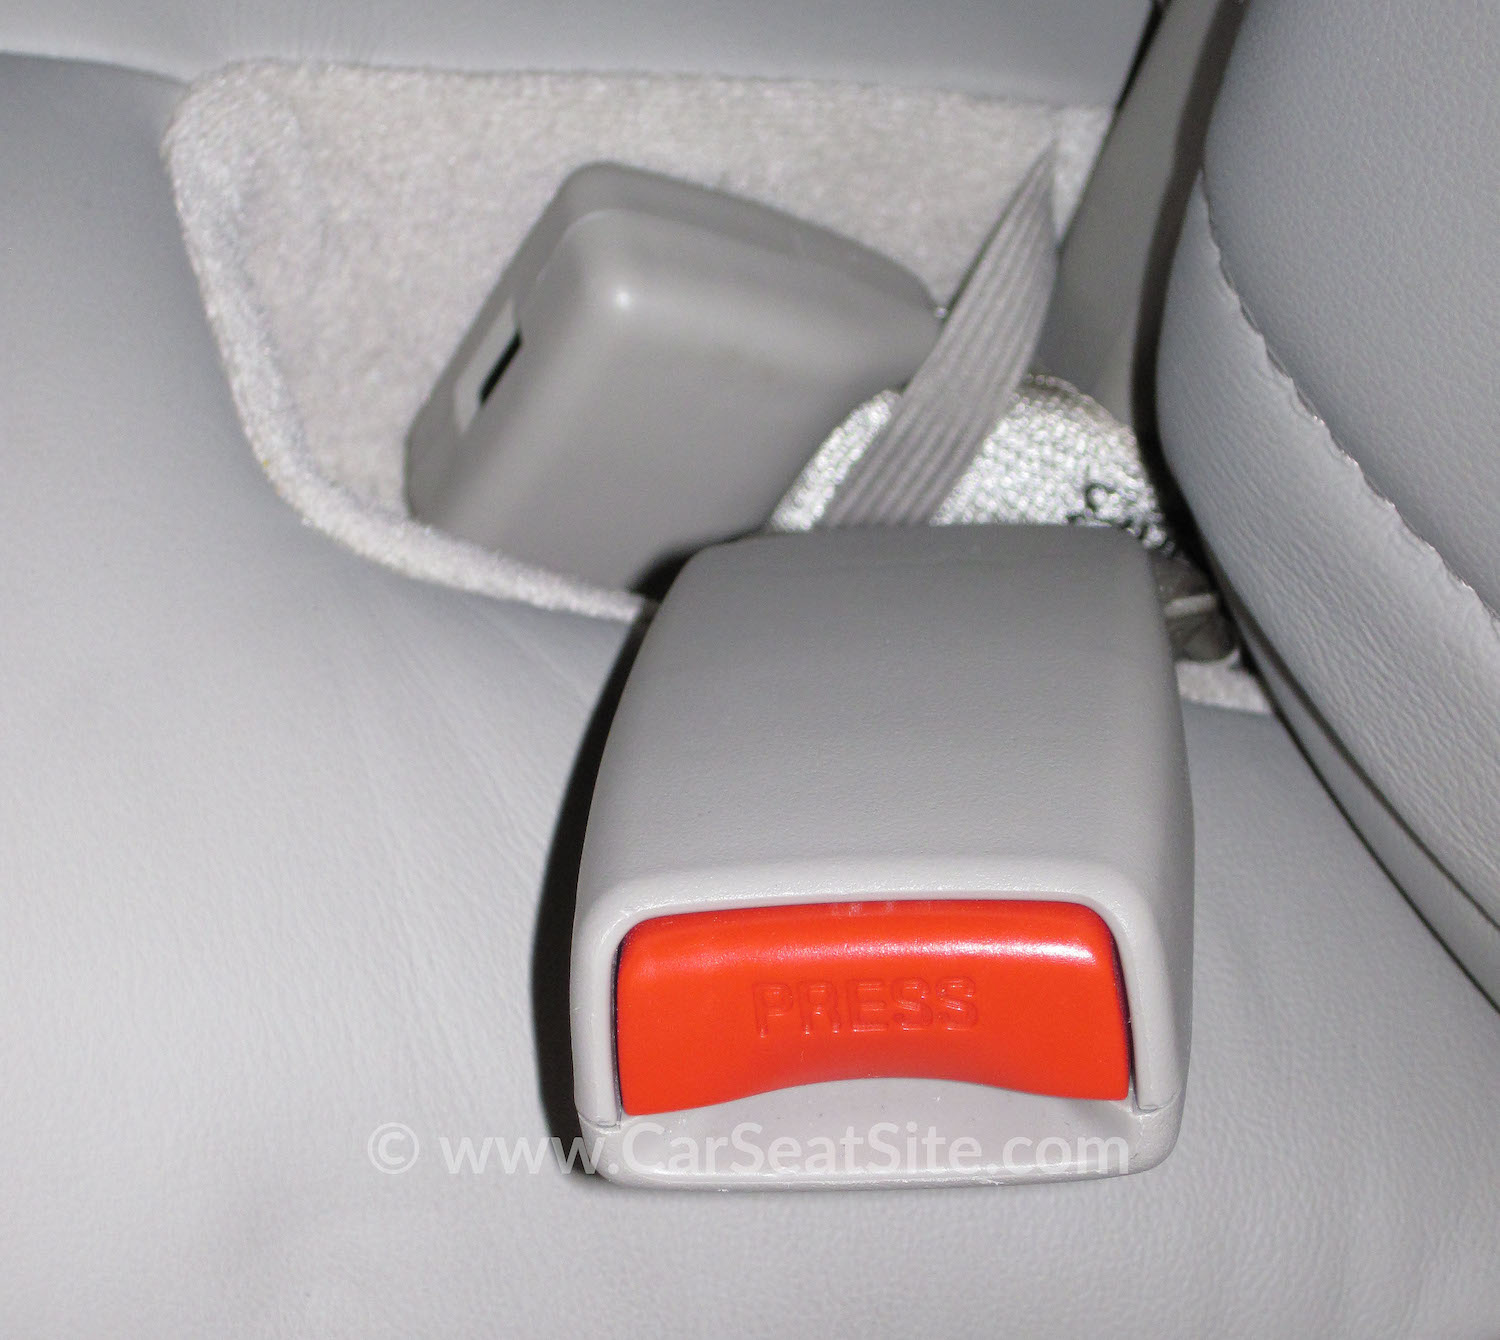
Buckle: the female end of a seat belt with the seat belt release button, usually on a short stalk that can be webbing or plastic-covered metal
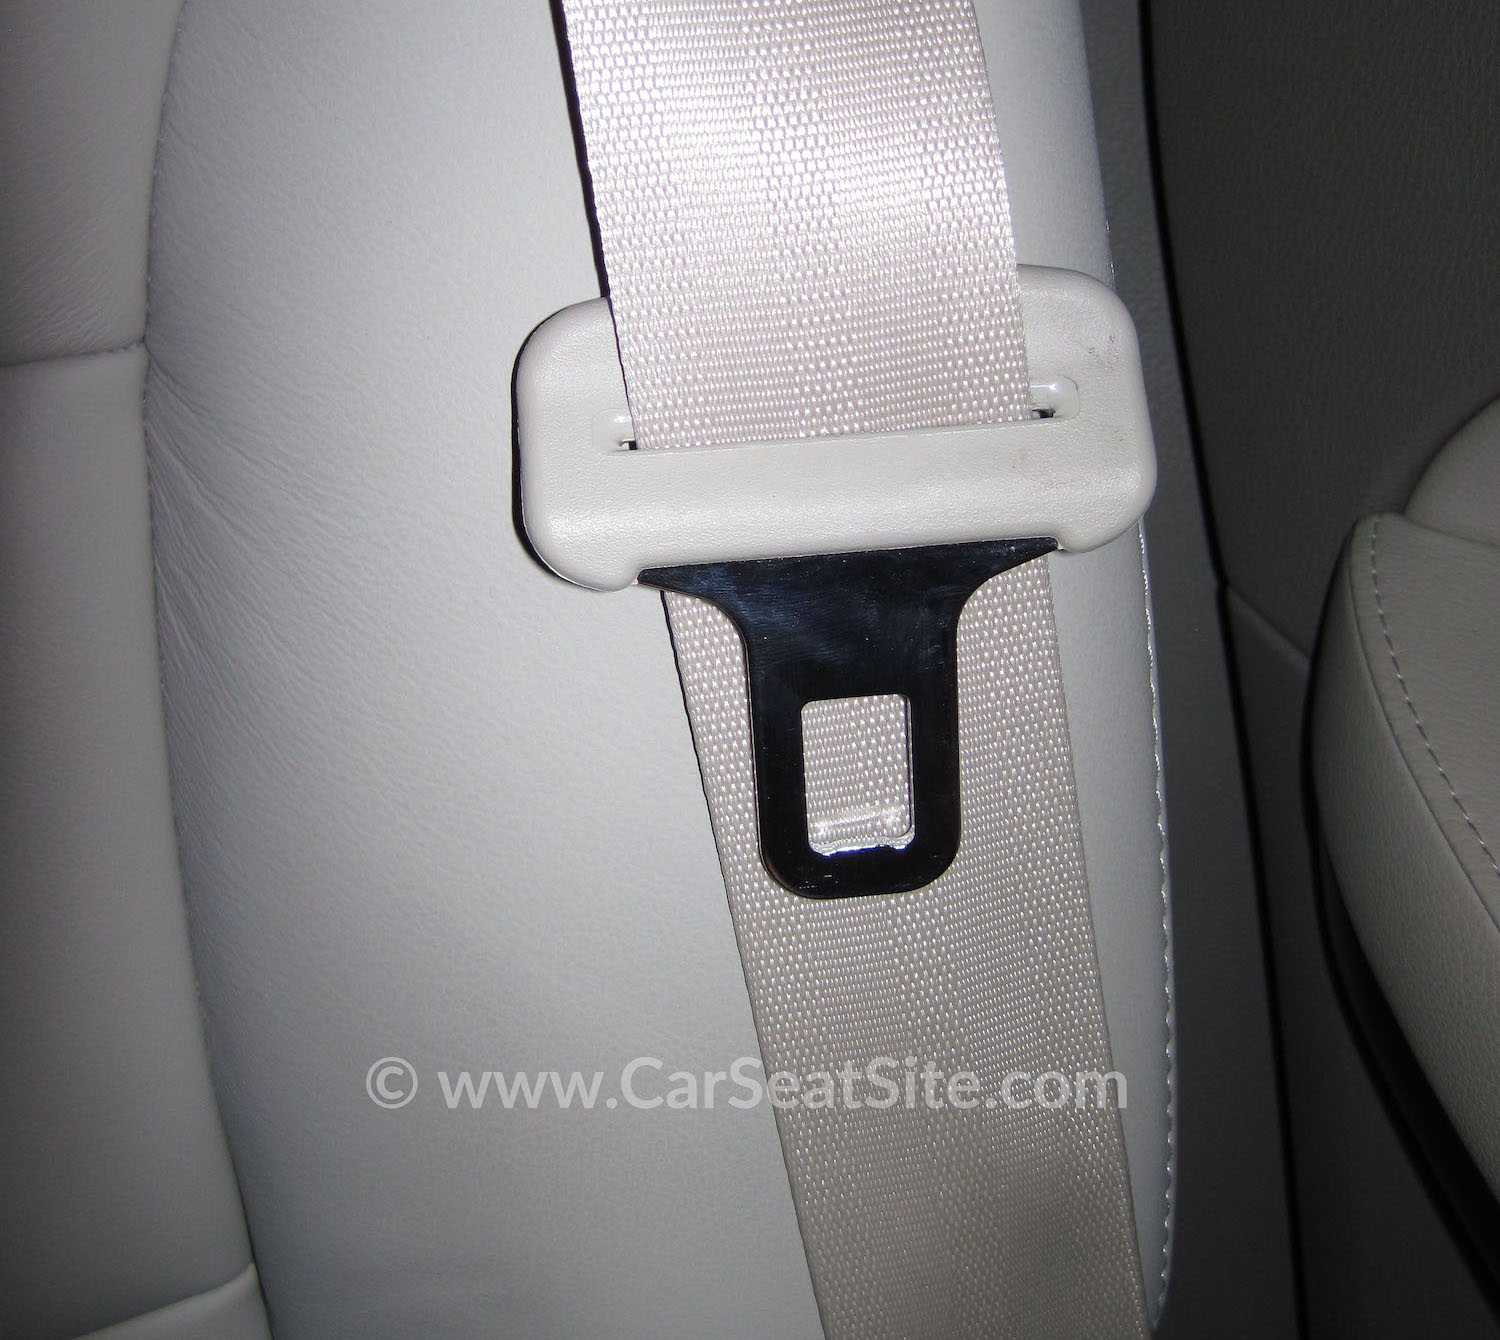
Latchplate: the silver metal male end connector of a seat belt

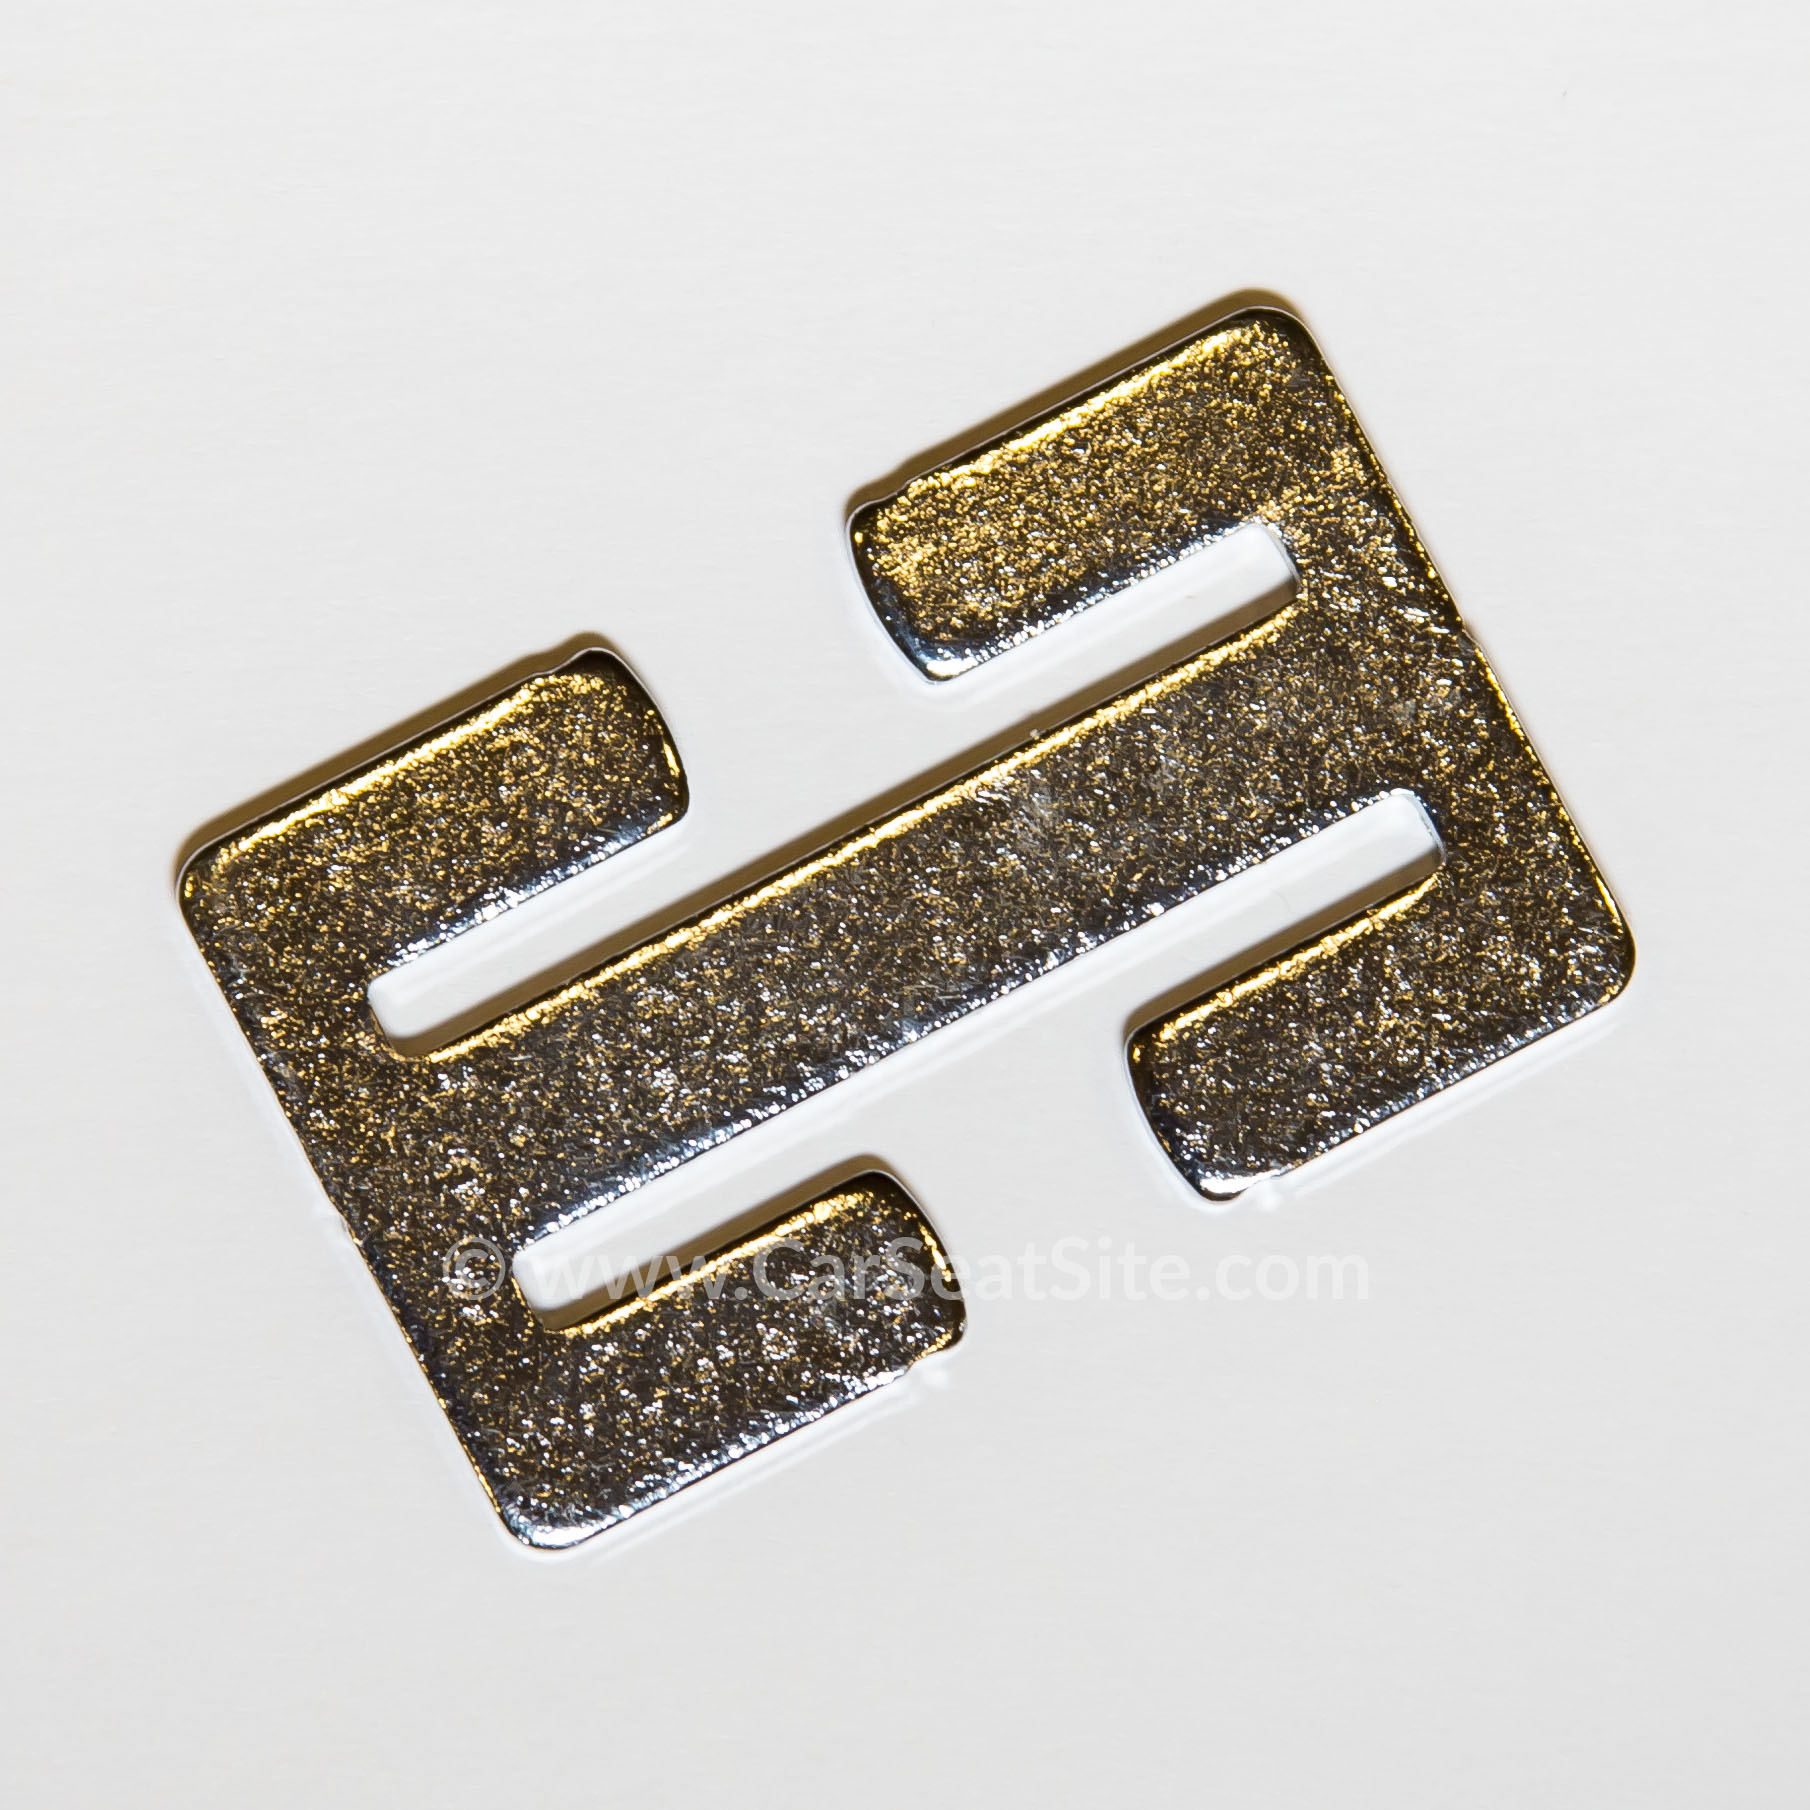
Locking clip: the metal H-shaped clip that comes with some carseats; it is used to keep the lap portion of a lap/shoulder belt tight on the carseat
Retractor: the mechanism that provides tension on a lap/shoulder belt and some lap-only belts; it allows the seat belt to retract and pull out and is hidden inside the panels on the walls of the vehicle or in the vehicle seatback
Types of Seat Belts:
Lap-only belt: less common type of seat belt typically found in older vehicles and in the center of rear seating positions
 How Does It Work? Some lap-only belts have a tail with which to pull the excess slack out of the belt while others have a retractor that spools the excess belt slack. A plastic piece may attach the tail end to the lap belt; that keeps it neat and out of the way only. Lap-only belts that have a retractor may either have an ALR retractor (more common) or an ELR retractor (less common). Retractor types are discussed below.
Lap/shoulder belt or 3-point belt: most common type of seat belt in modern vehicles; consists of 3-points of contact with the body: one at each hip and one at a shoulder
How Does It Work? To form the 3-point lap/shoulder belt, bring the end latchplate down and buckle it into its special buckle. This latchplate is usually smaller (not always), but definitely has a different appearance than the regular seat belt latchplate to set it apart. Now you have created your lap/shoulder belt and can use it as you normally do. You MUST buckle the special latchplate in to form the lap/shoulder belt.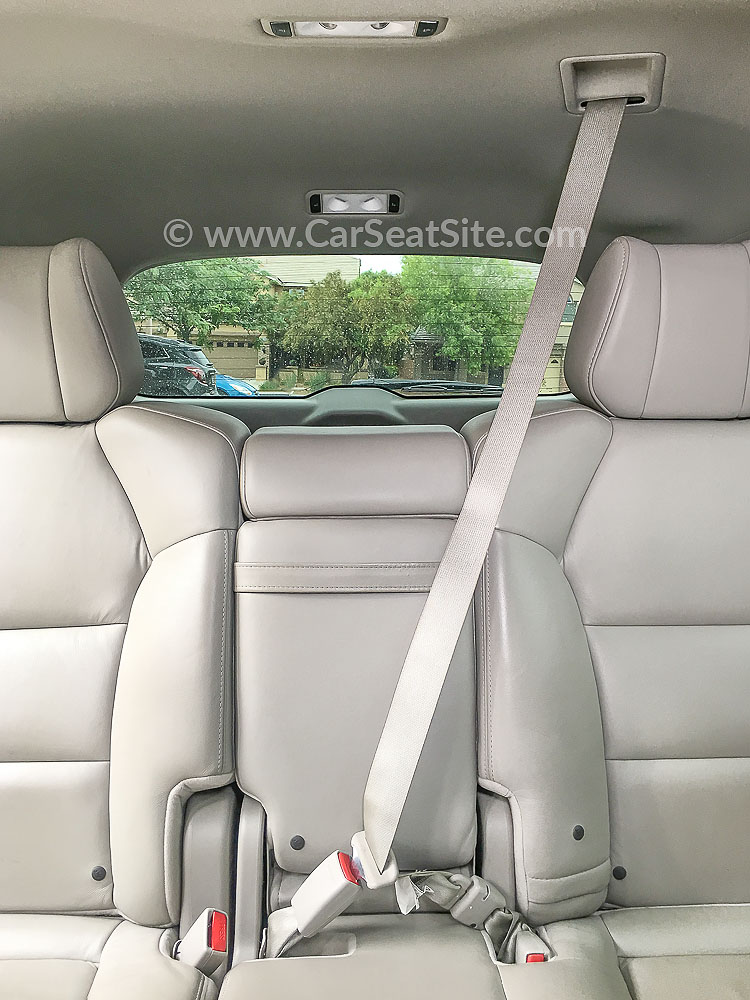
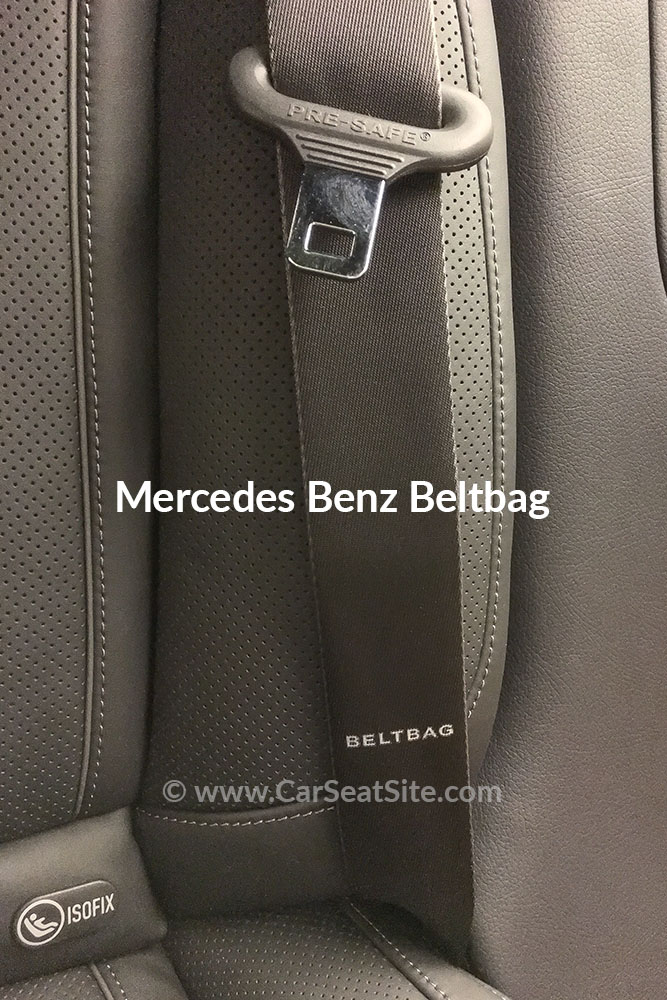
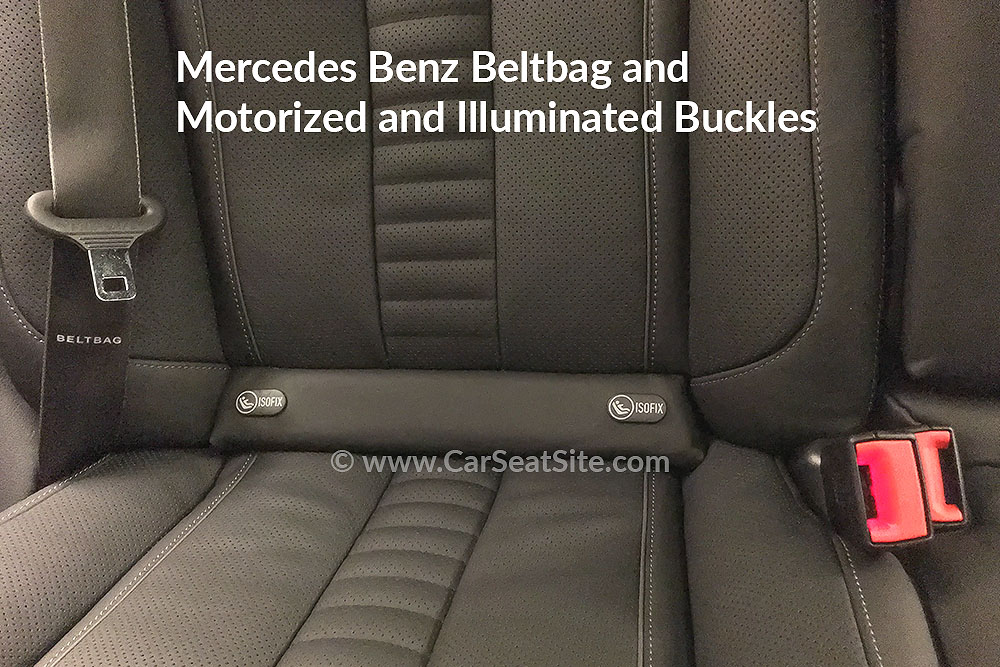
Inflatable seat belt: lap/shoulder belts with an airbag in the shoulder portion of the belt
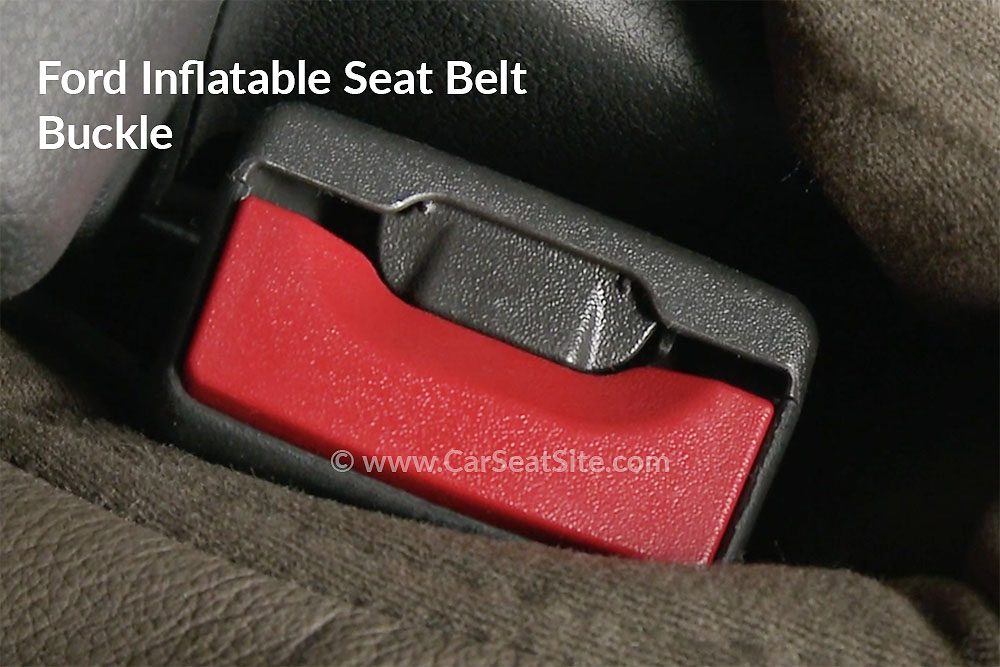
How Does It Work? An inflatable seat belt spreads crash forces out over a wide area of the torso to reduce injury. They can be found in the outboard seating positions of some Ford and Lincoln vehicles, and Mercedes Benz has them also in the outboard seating positions in E- and S-Class vehicles that have the optional PRE-SAFE Rear Seat Package under the name “Beltbag®.” Some airlines use them as well. Unlike frontal airbags, inflatable seat belts use cold compressed gas from air canisters to inflate at slower speeds. The gas canisters are located next to the base of the vehicle seat and when a crash is detected, in the Ford vehicles, the gas is forced up through the latchplate and into the airbag that is folded into the shoulder portion of the seat belt.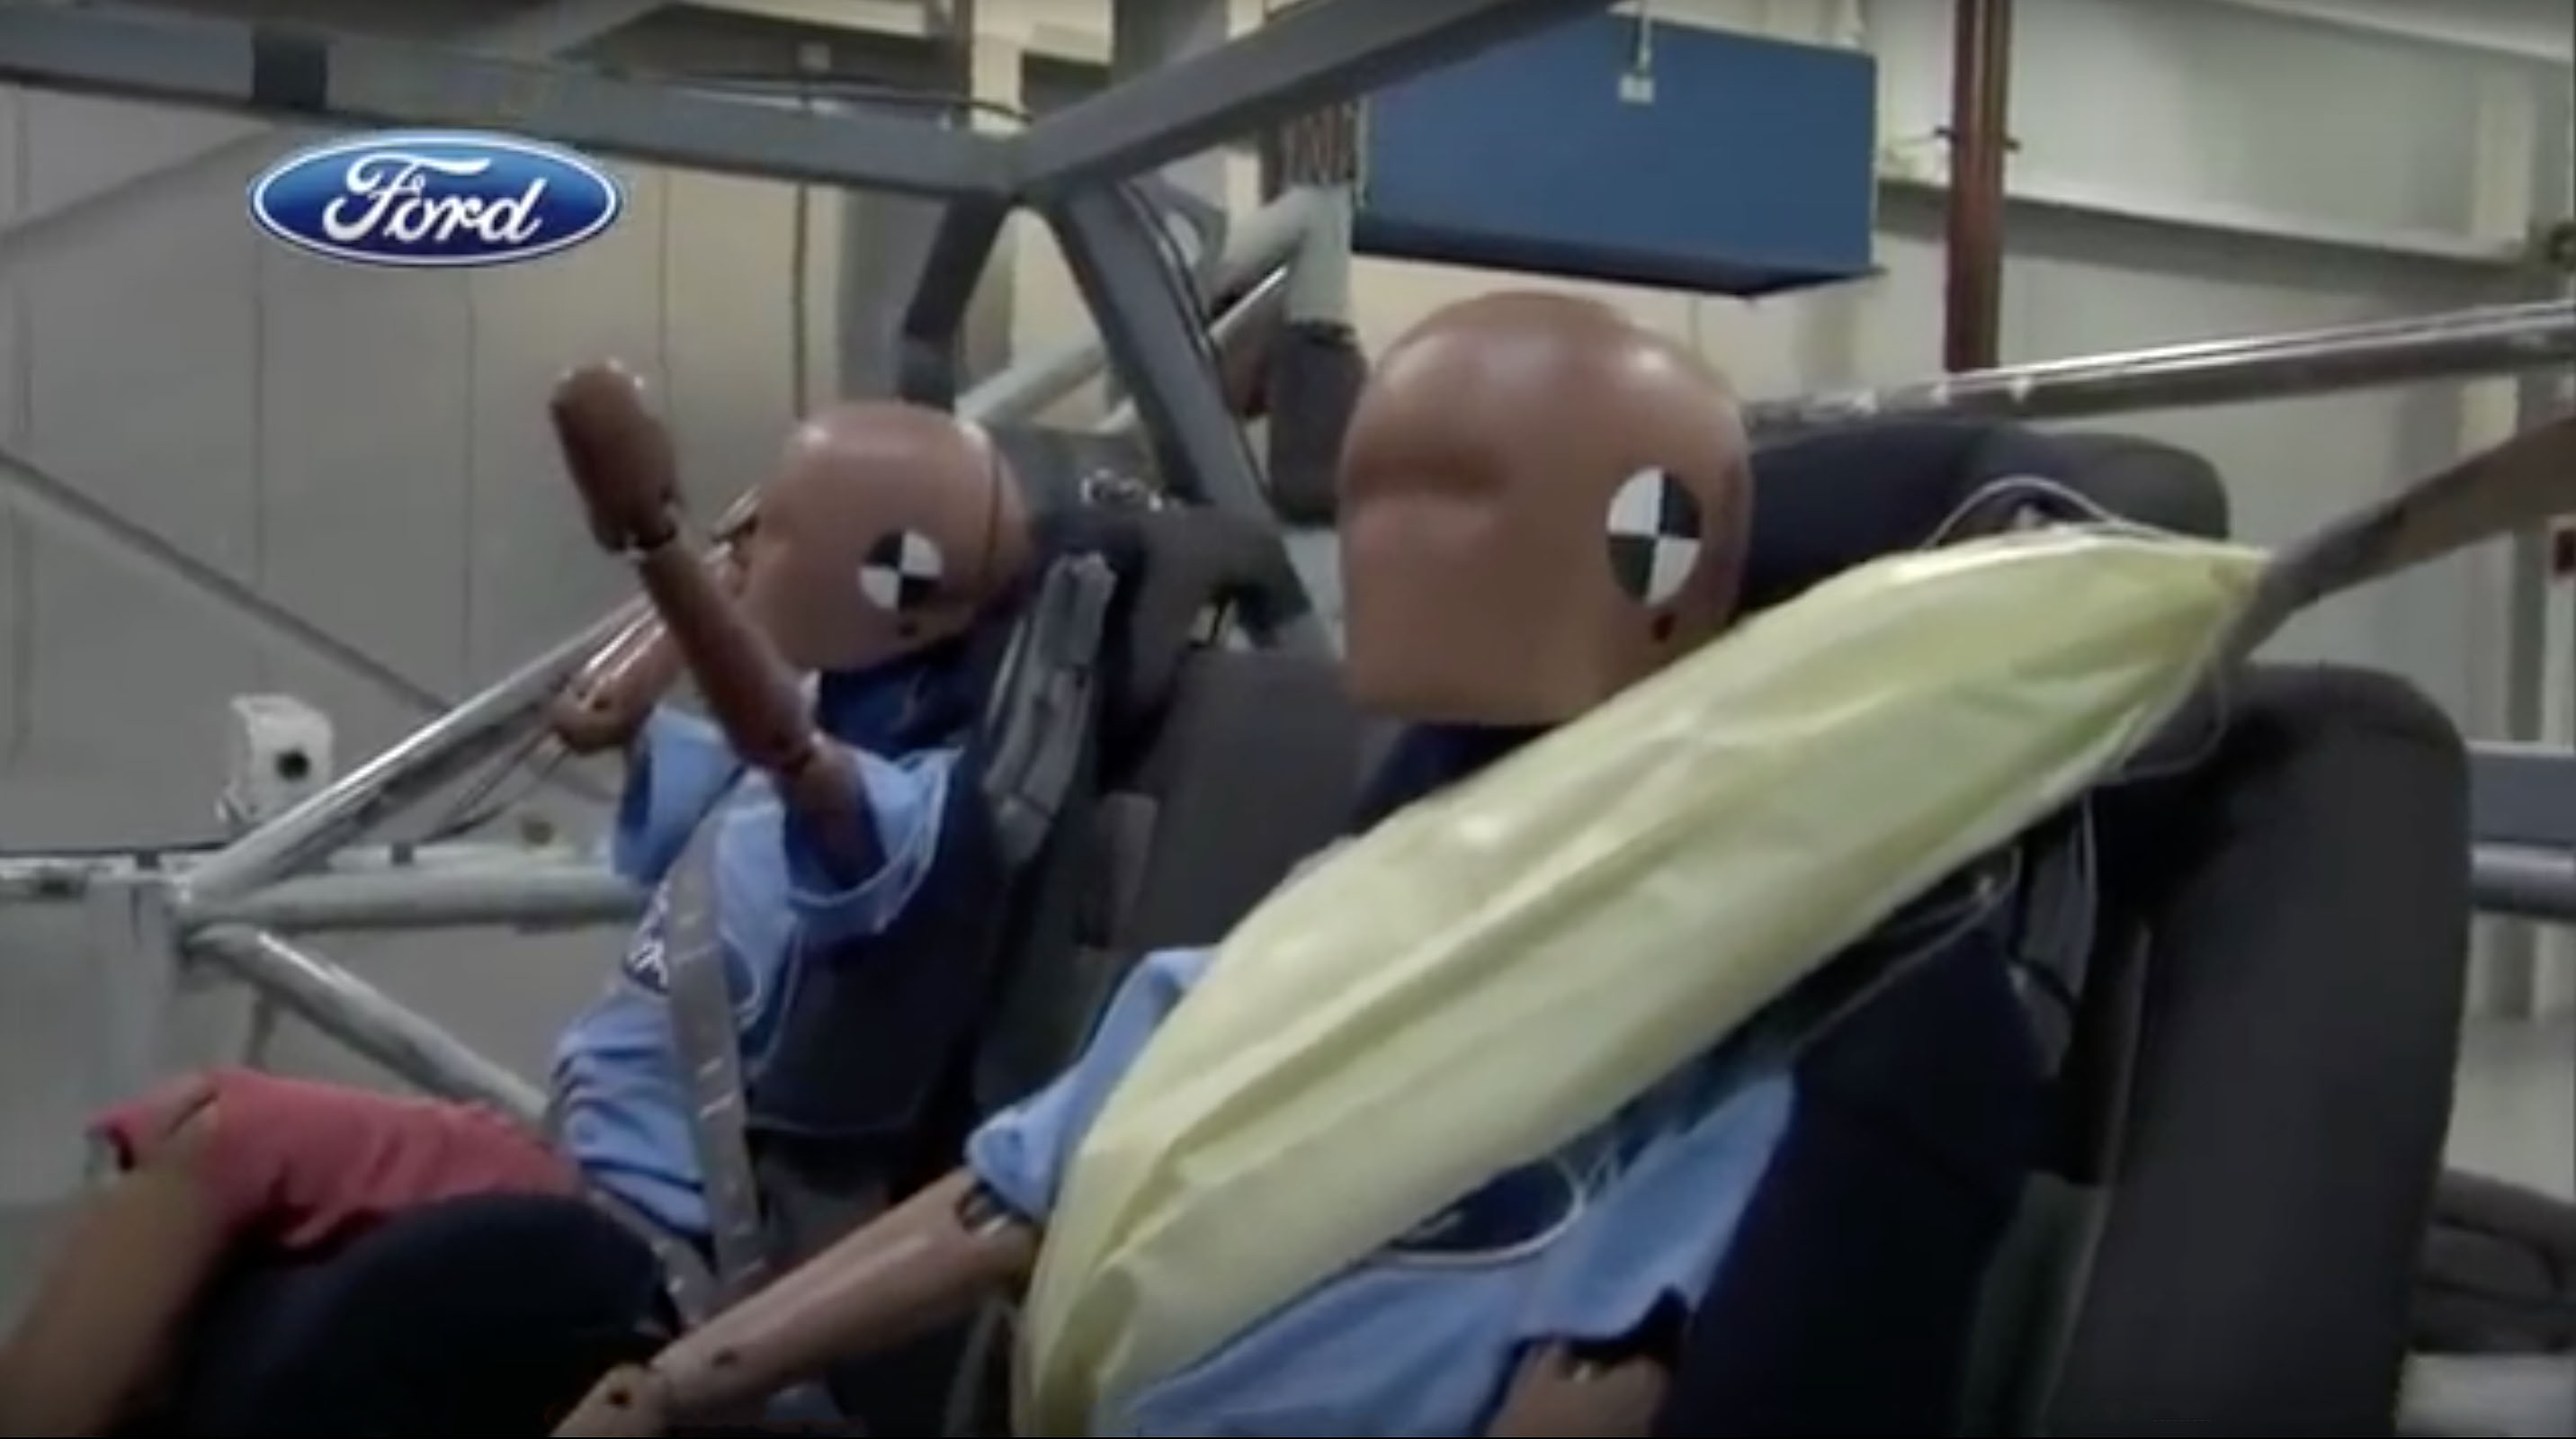


 or booster
 seat can be installed with inflatable seat belts. Many models are not compatible with inflatable belts because they have not been crash tested with them yet or have been tested and the carseat manufacturers have determined that the results were below required standards. Because the Ford inflatable seat belts have 2 retractors, one for the shoulder belt (ELR) and one for the lap belt (switchable), carseat manufacturers that allow installation may have different installation instructions for them.
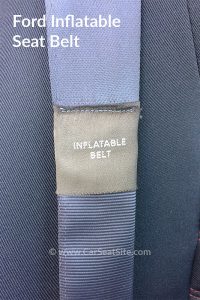

Types of Retractors:
ELR (Emergency Locking Retractor): locks only on sudden stop or collision (covered in the Locking Your Seat Belt video above); found on driver’s seat belt
How Does It Work? When you pull the seat belt out all the way to the end slowly, it will not lock. ELRs do lock, but only in sudden stopping situations. This YouTube video shows what the inside of a retractor looks like.Vehicle-sensitive ELR: This type of ELR reacts by locking when the vehicle stops suddenly or turns sharply. It will not lock when you tug on it.
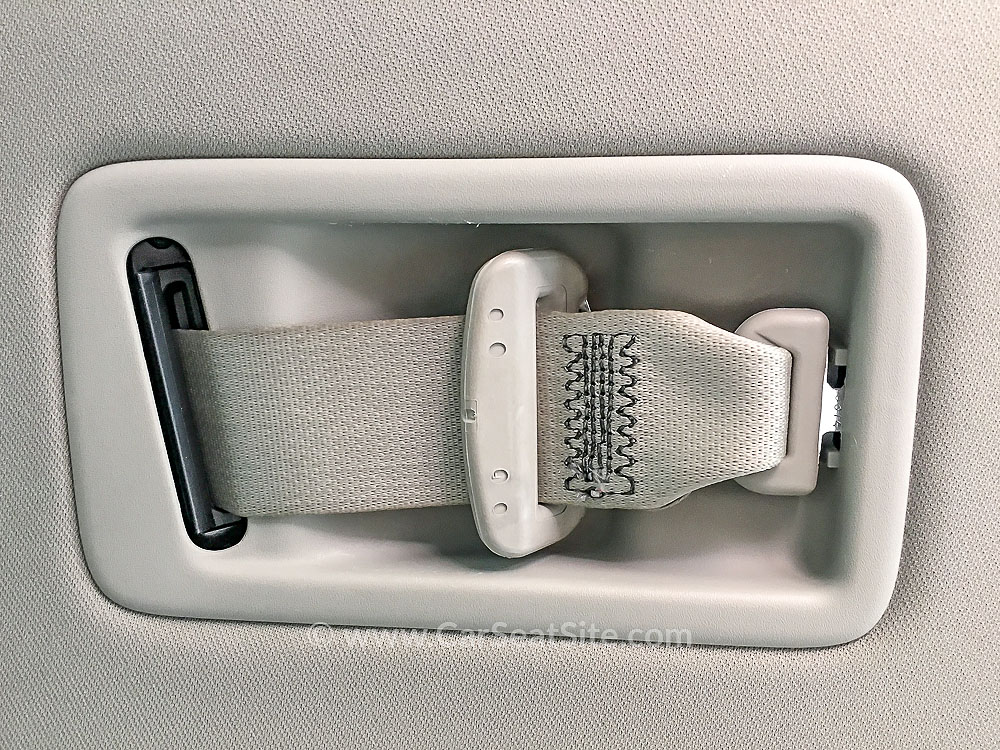
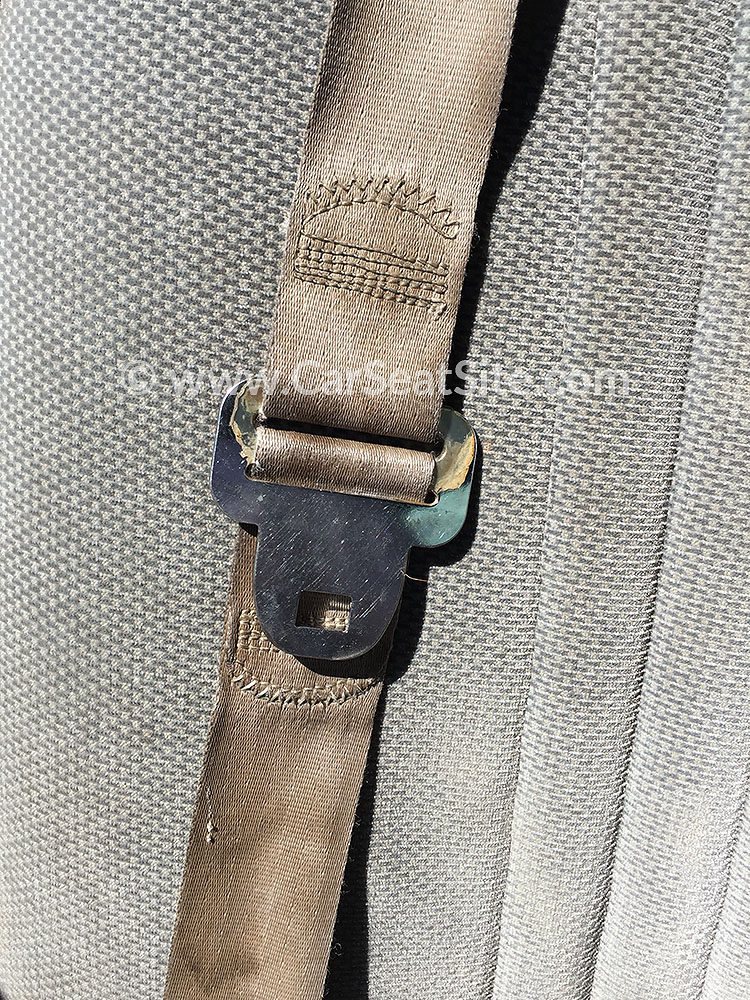
ALR (Automatic Locking Retractor): is always locked when pulled out; once it is buckled, it gets tighter and tighter, like an Anaconda snake
Example of an ALR retractor on a lap-only seat belt:
Switchable: locks on sudden stop or collision, or when slowly pulled out all the way (covered in the Locking Your Seat Belt video above); a combination of ELR and a manually locking retractor; the most common type of retractor found in vehicles manufactured recently
How Does It Work? Pulling the seat belt all the way out slowly switches the retractor to locked mode. To unlock the retractor, let the seat belt retract back most of the way back into the retractor.Types of Latchplates
Some seat belts use the latchplate to lock instead of the retractor.
Locking Latchplates
There are 2 types of locking latchplates: lightweight locking/cinching latchplate and locking latchplate. They both accomplish the same thing: locking the seat belt. The only reason for the terminology introduction here is that some vehicles manuals refer to these different types; technically they are both considered locking latchplates.
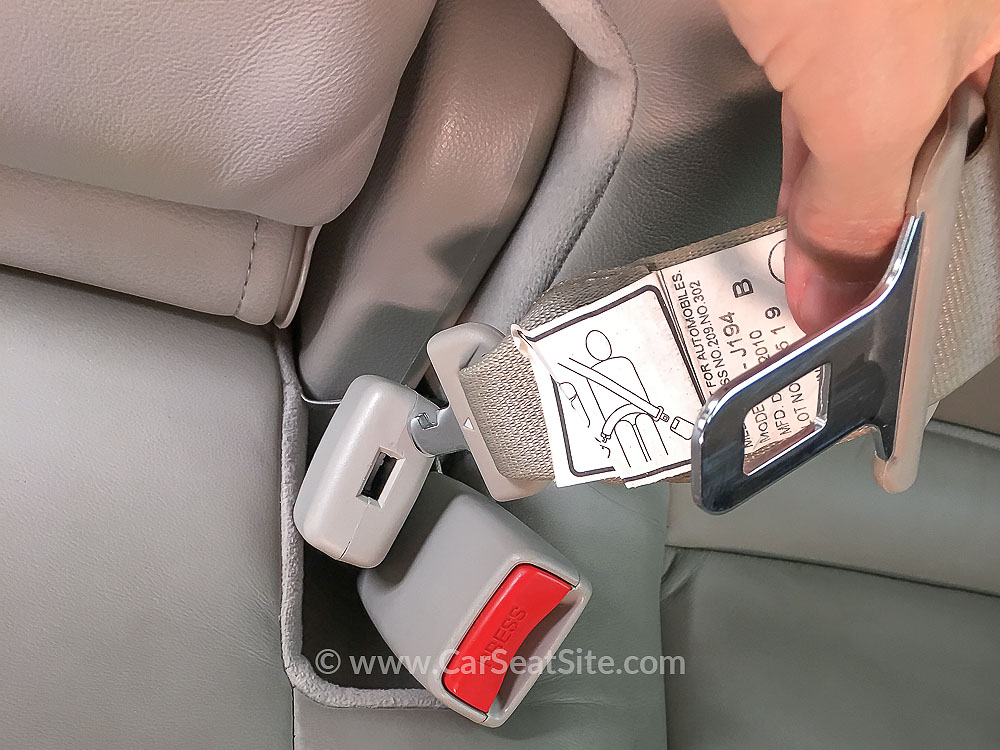
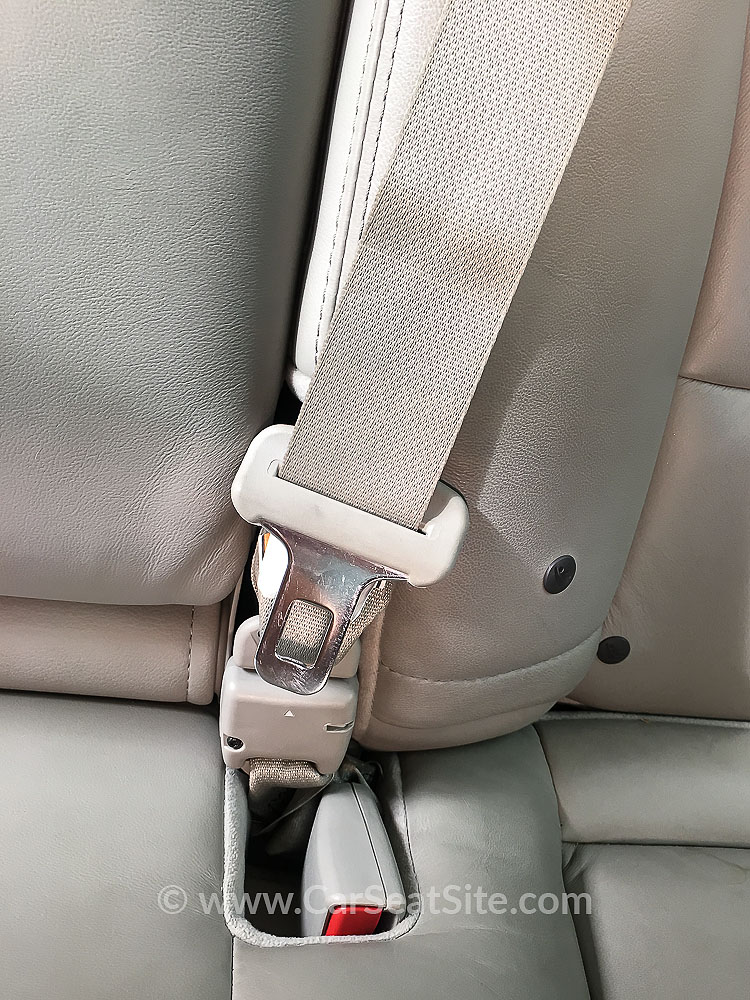
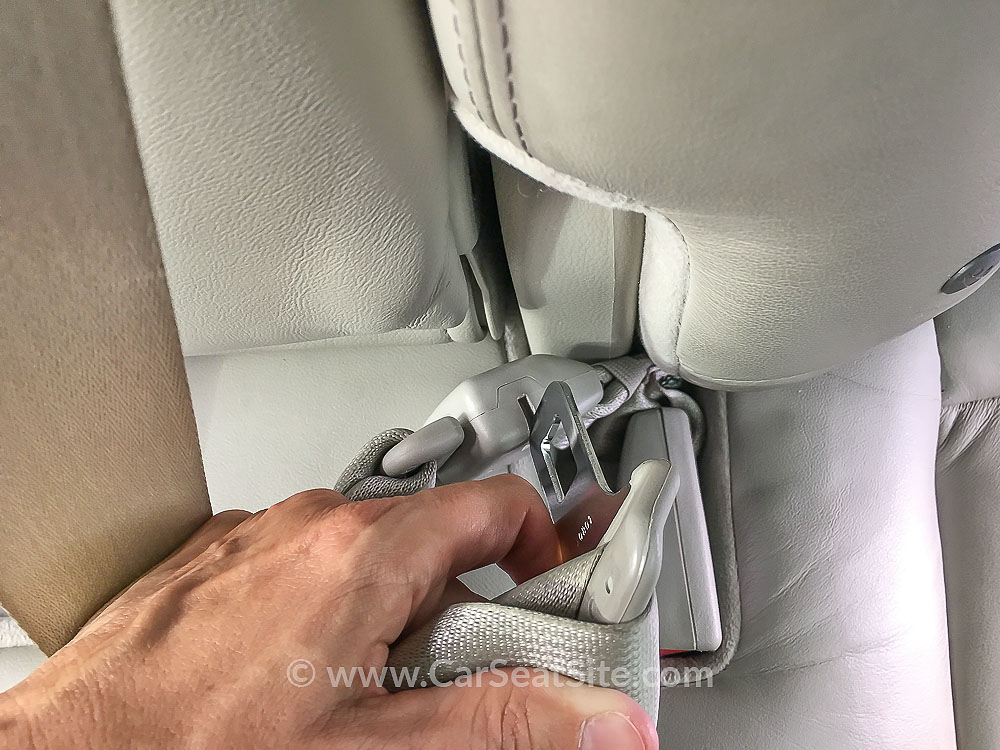
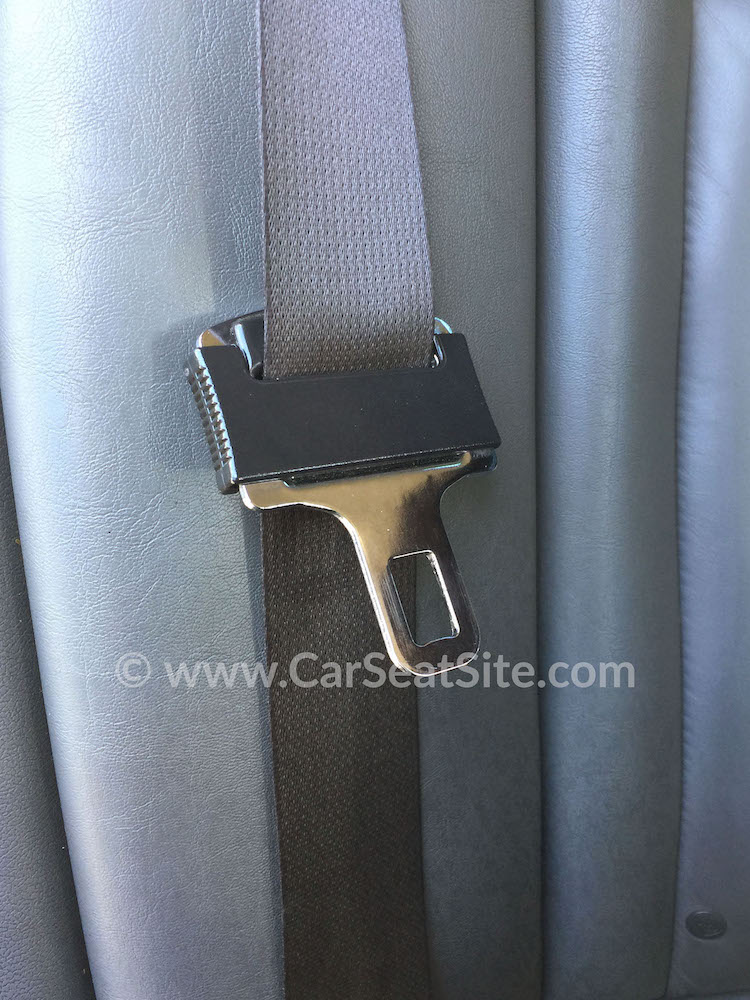
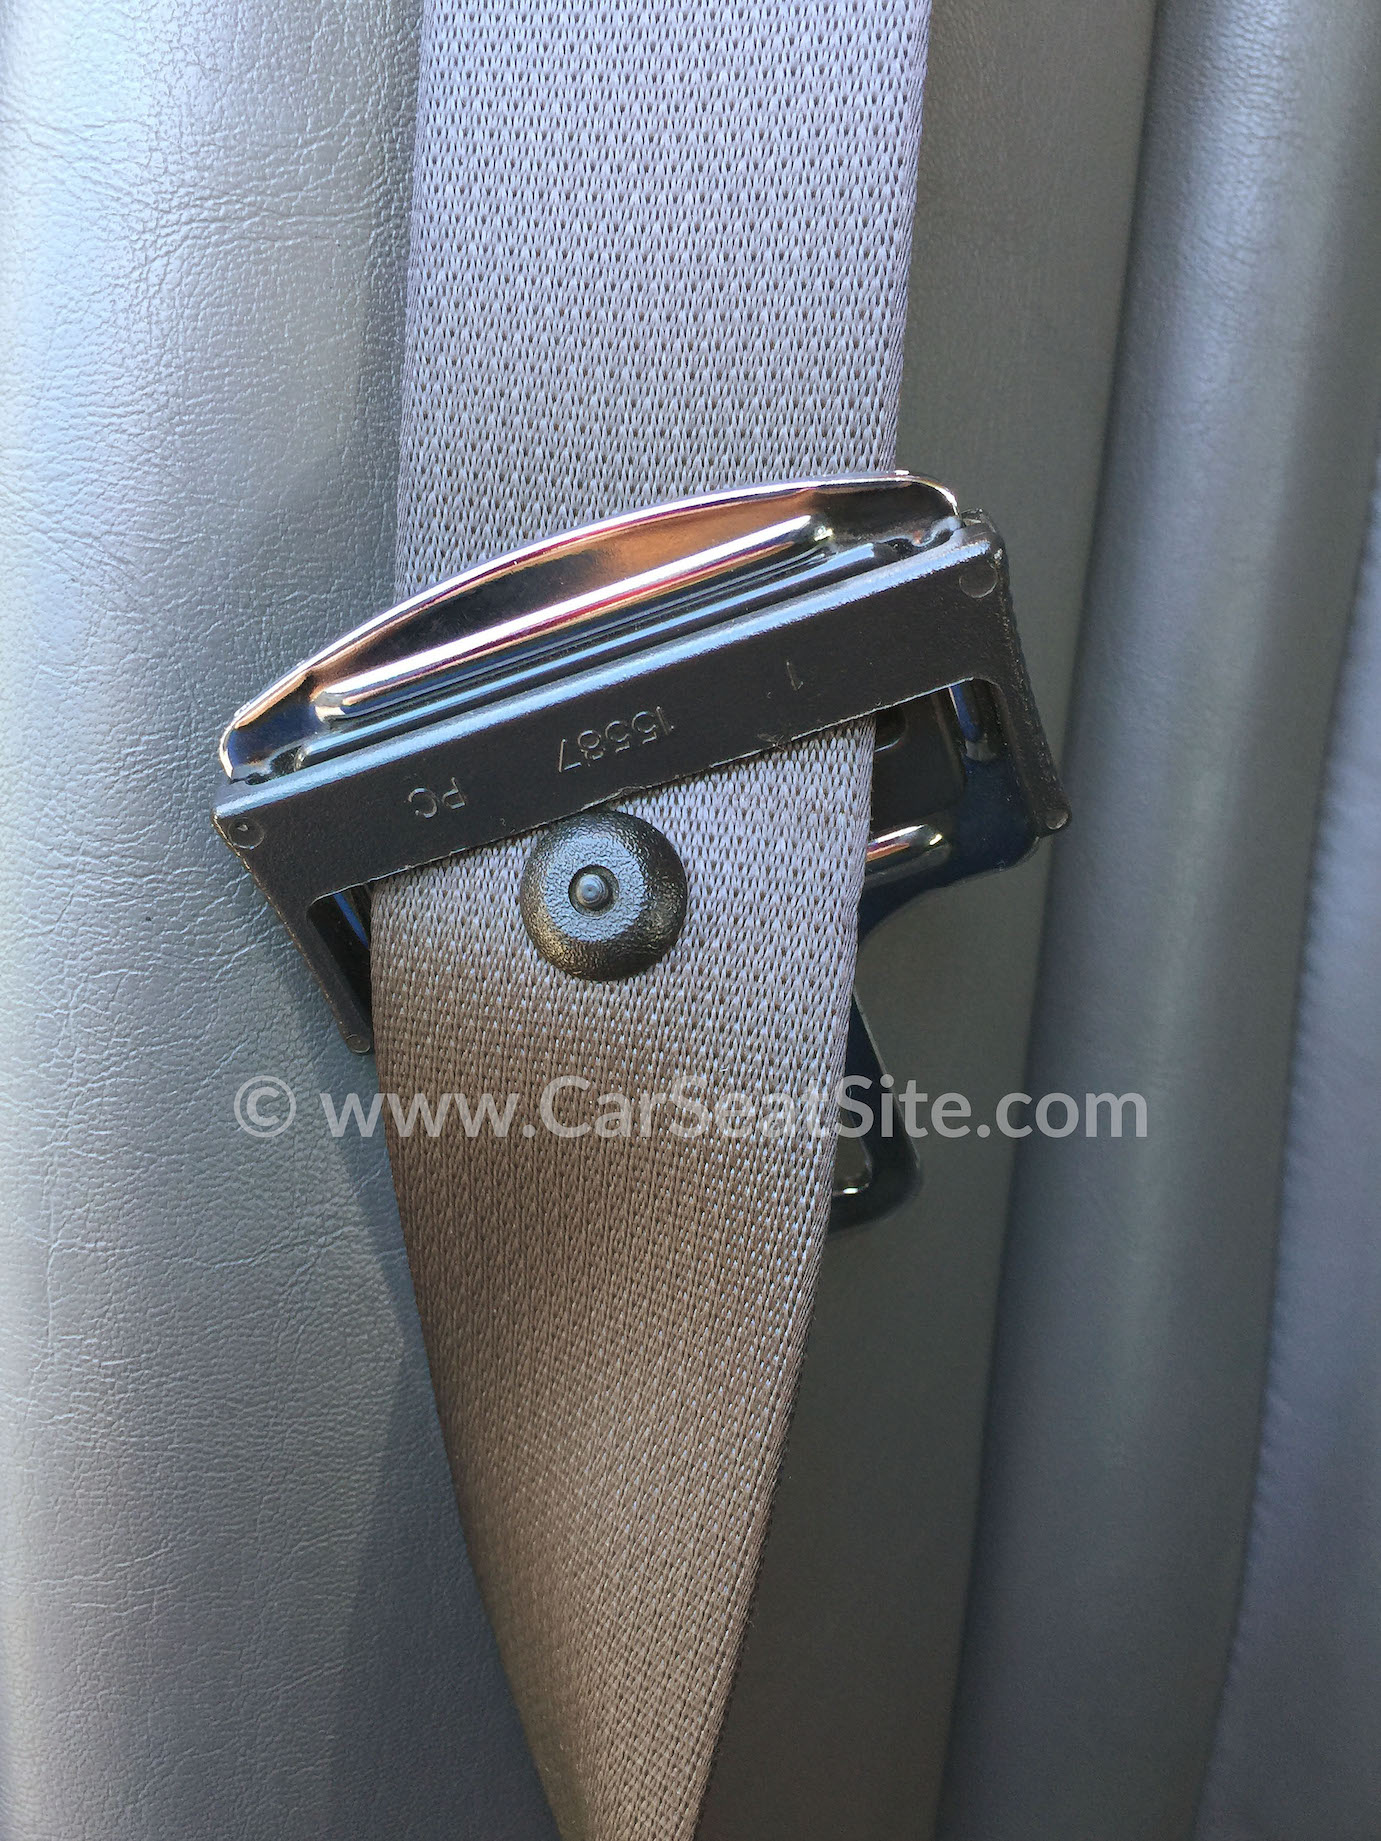
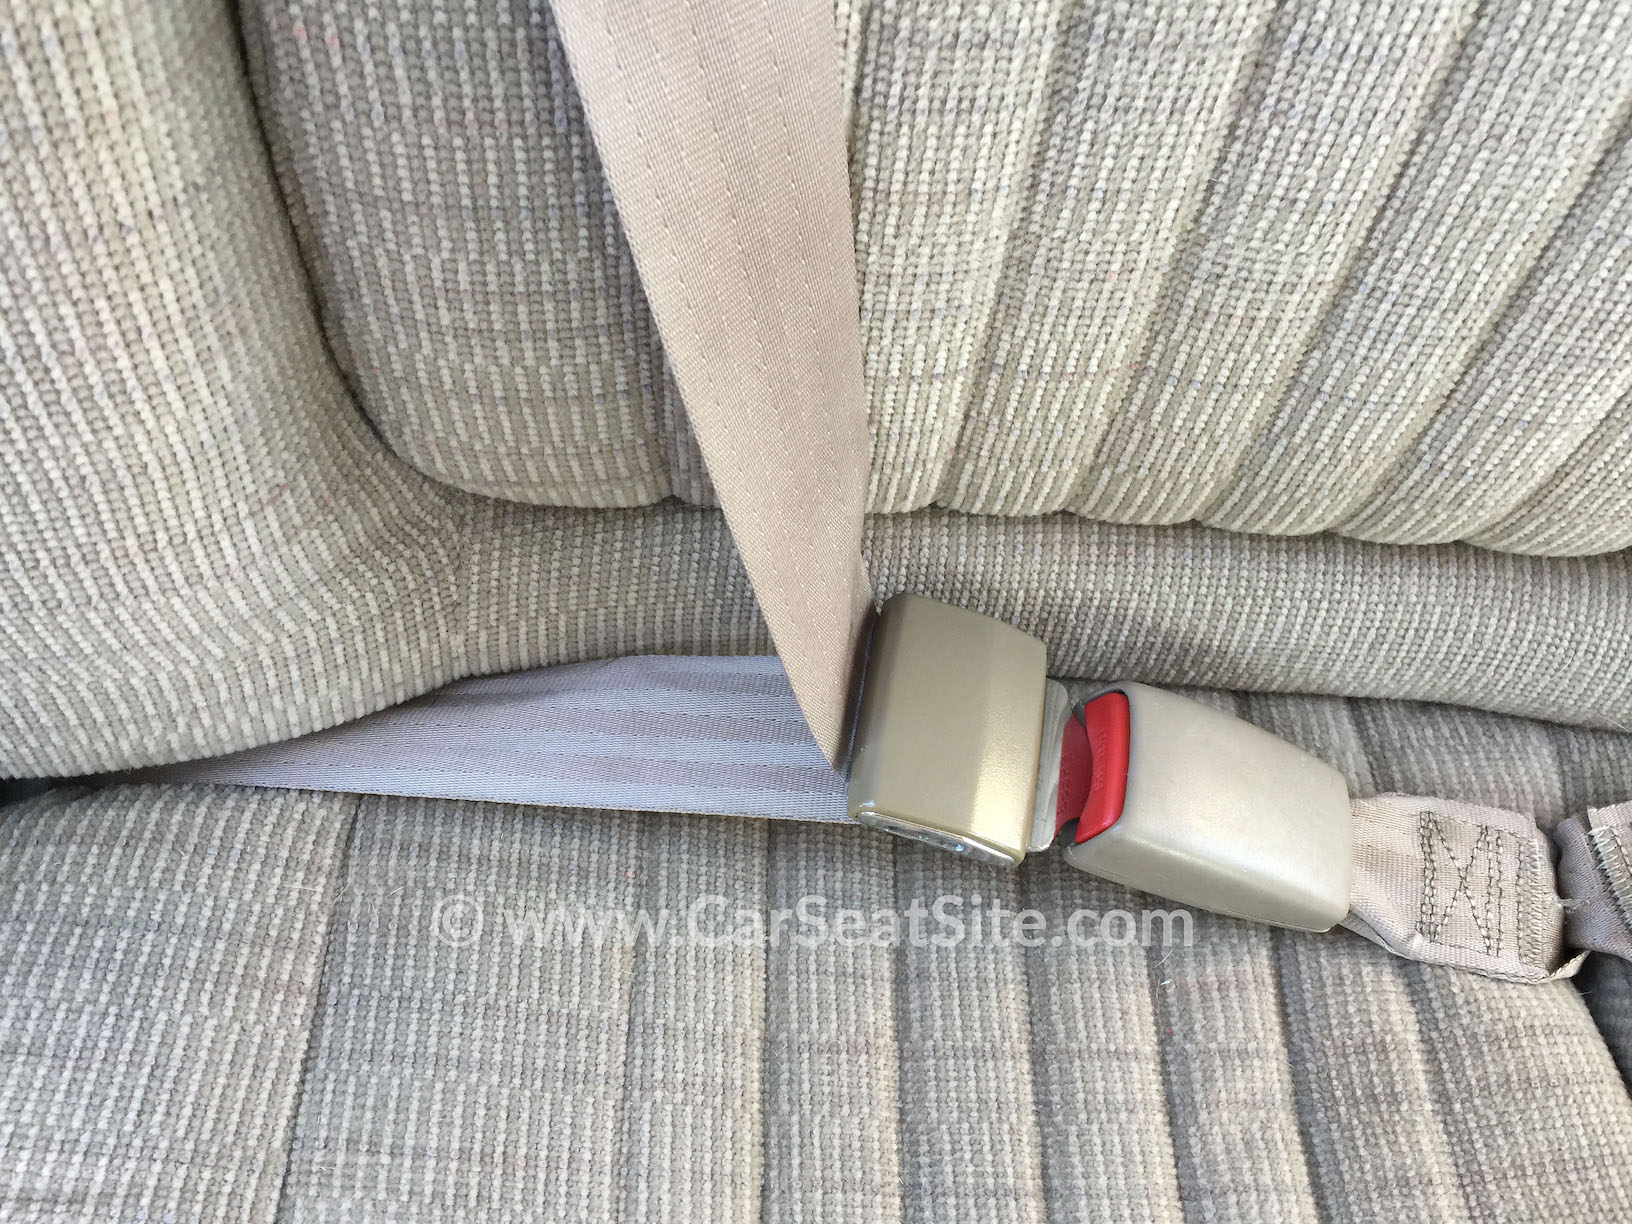
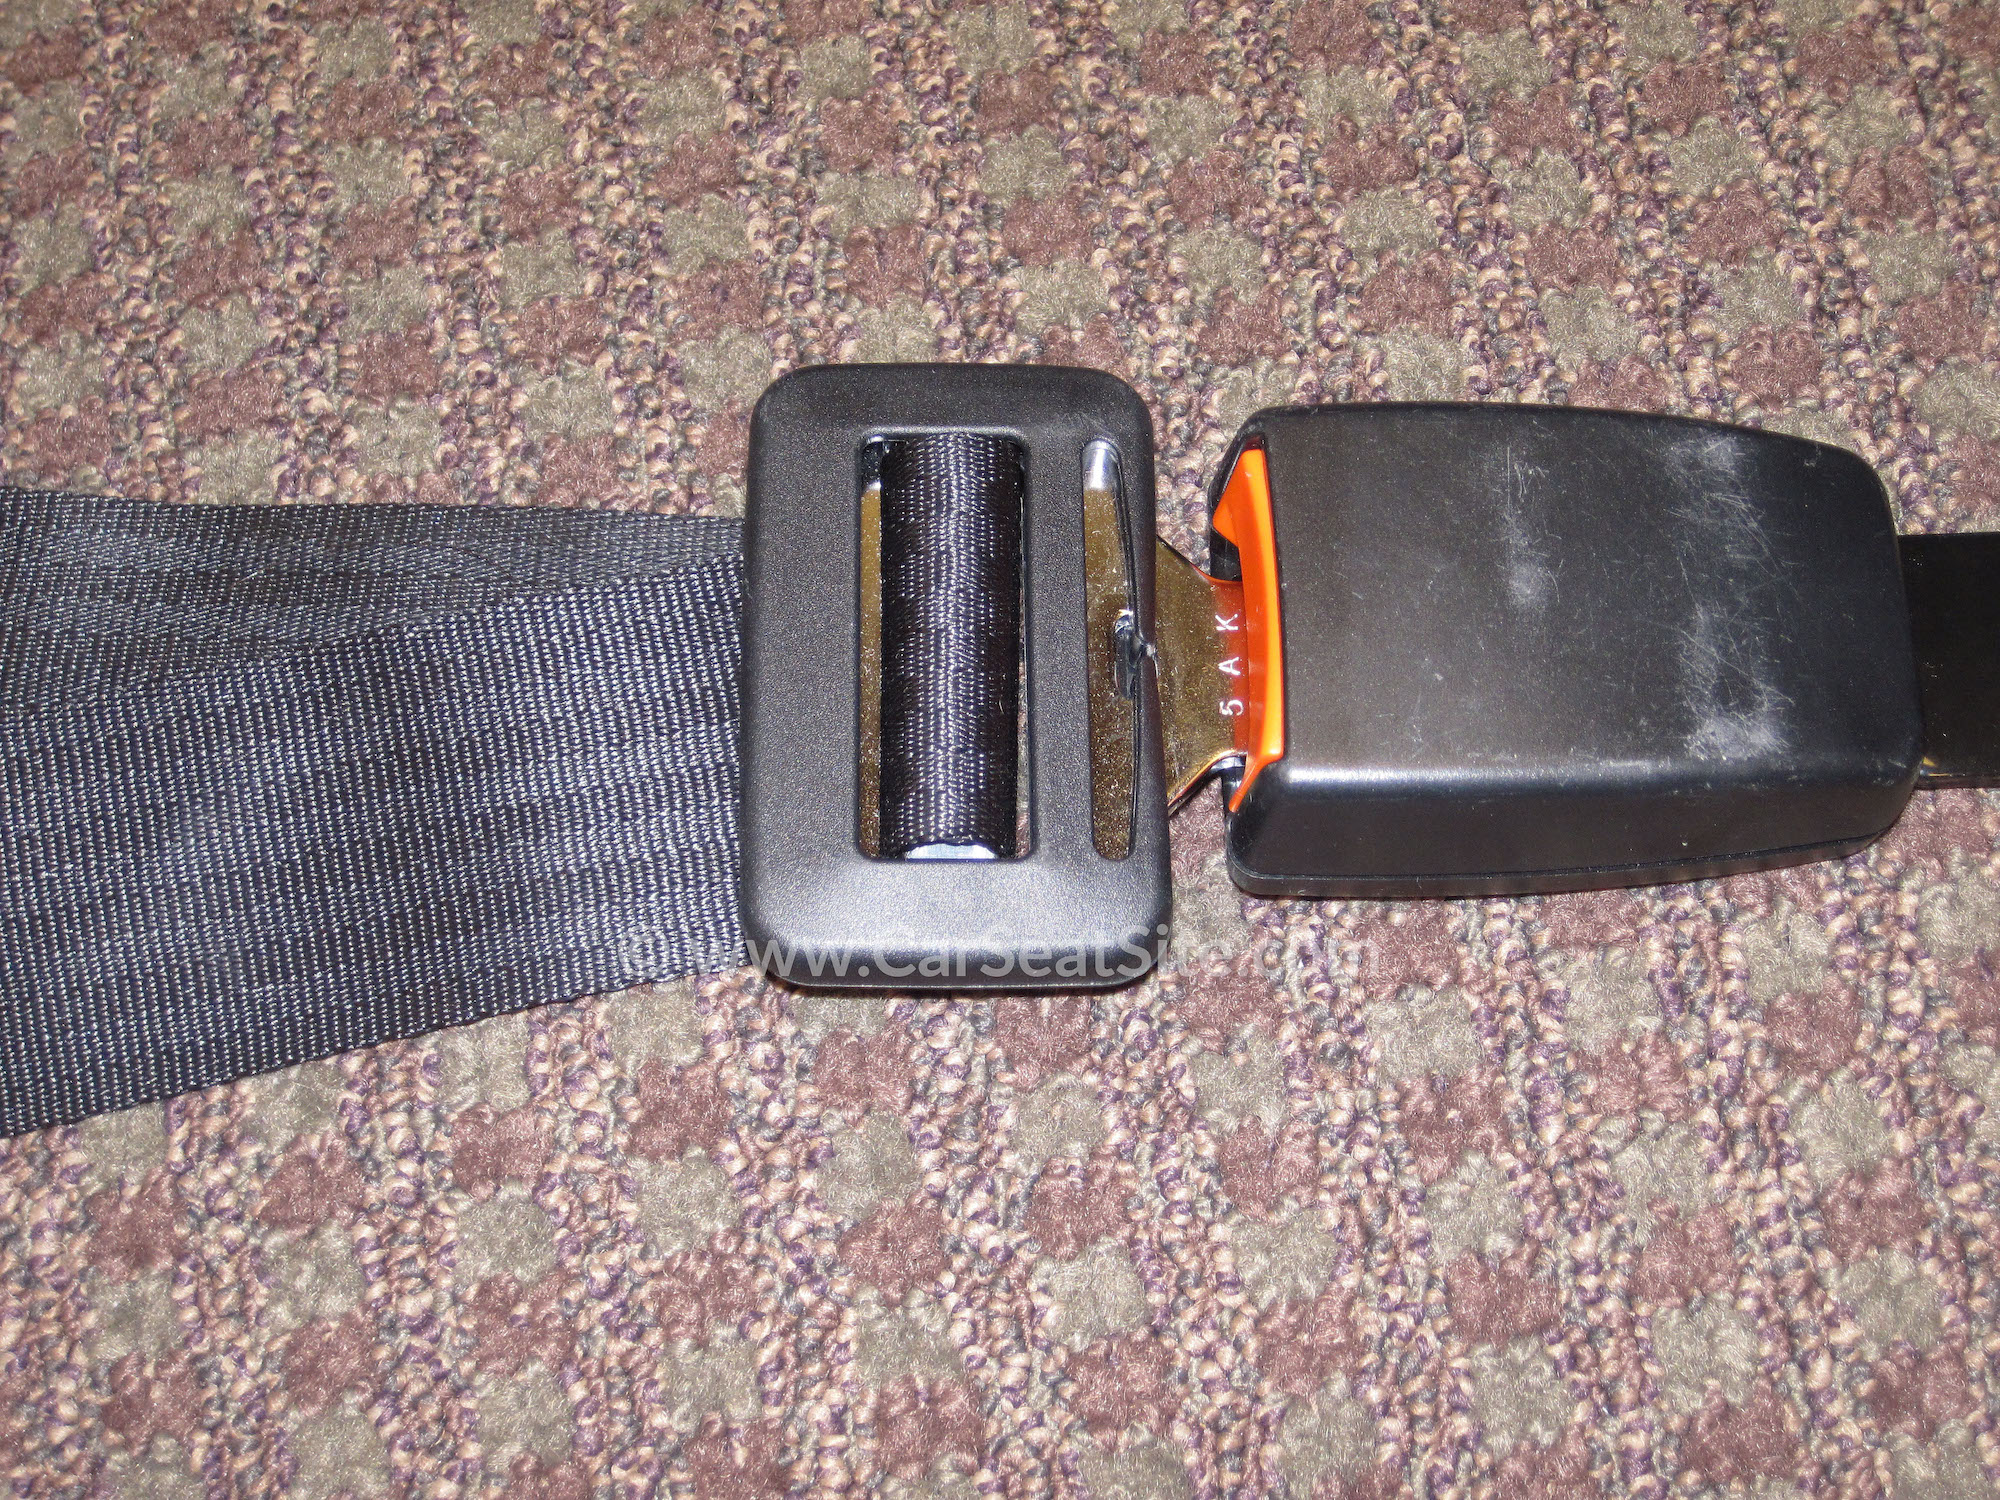
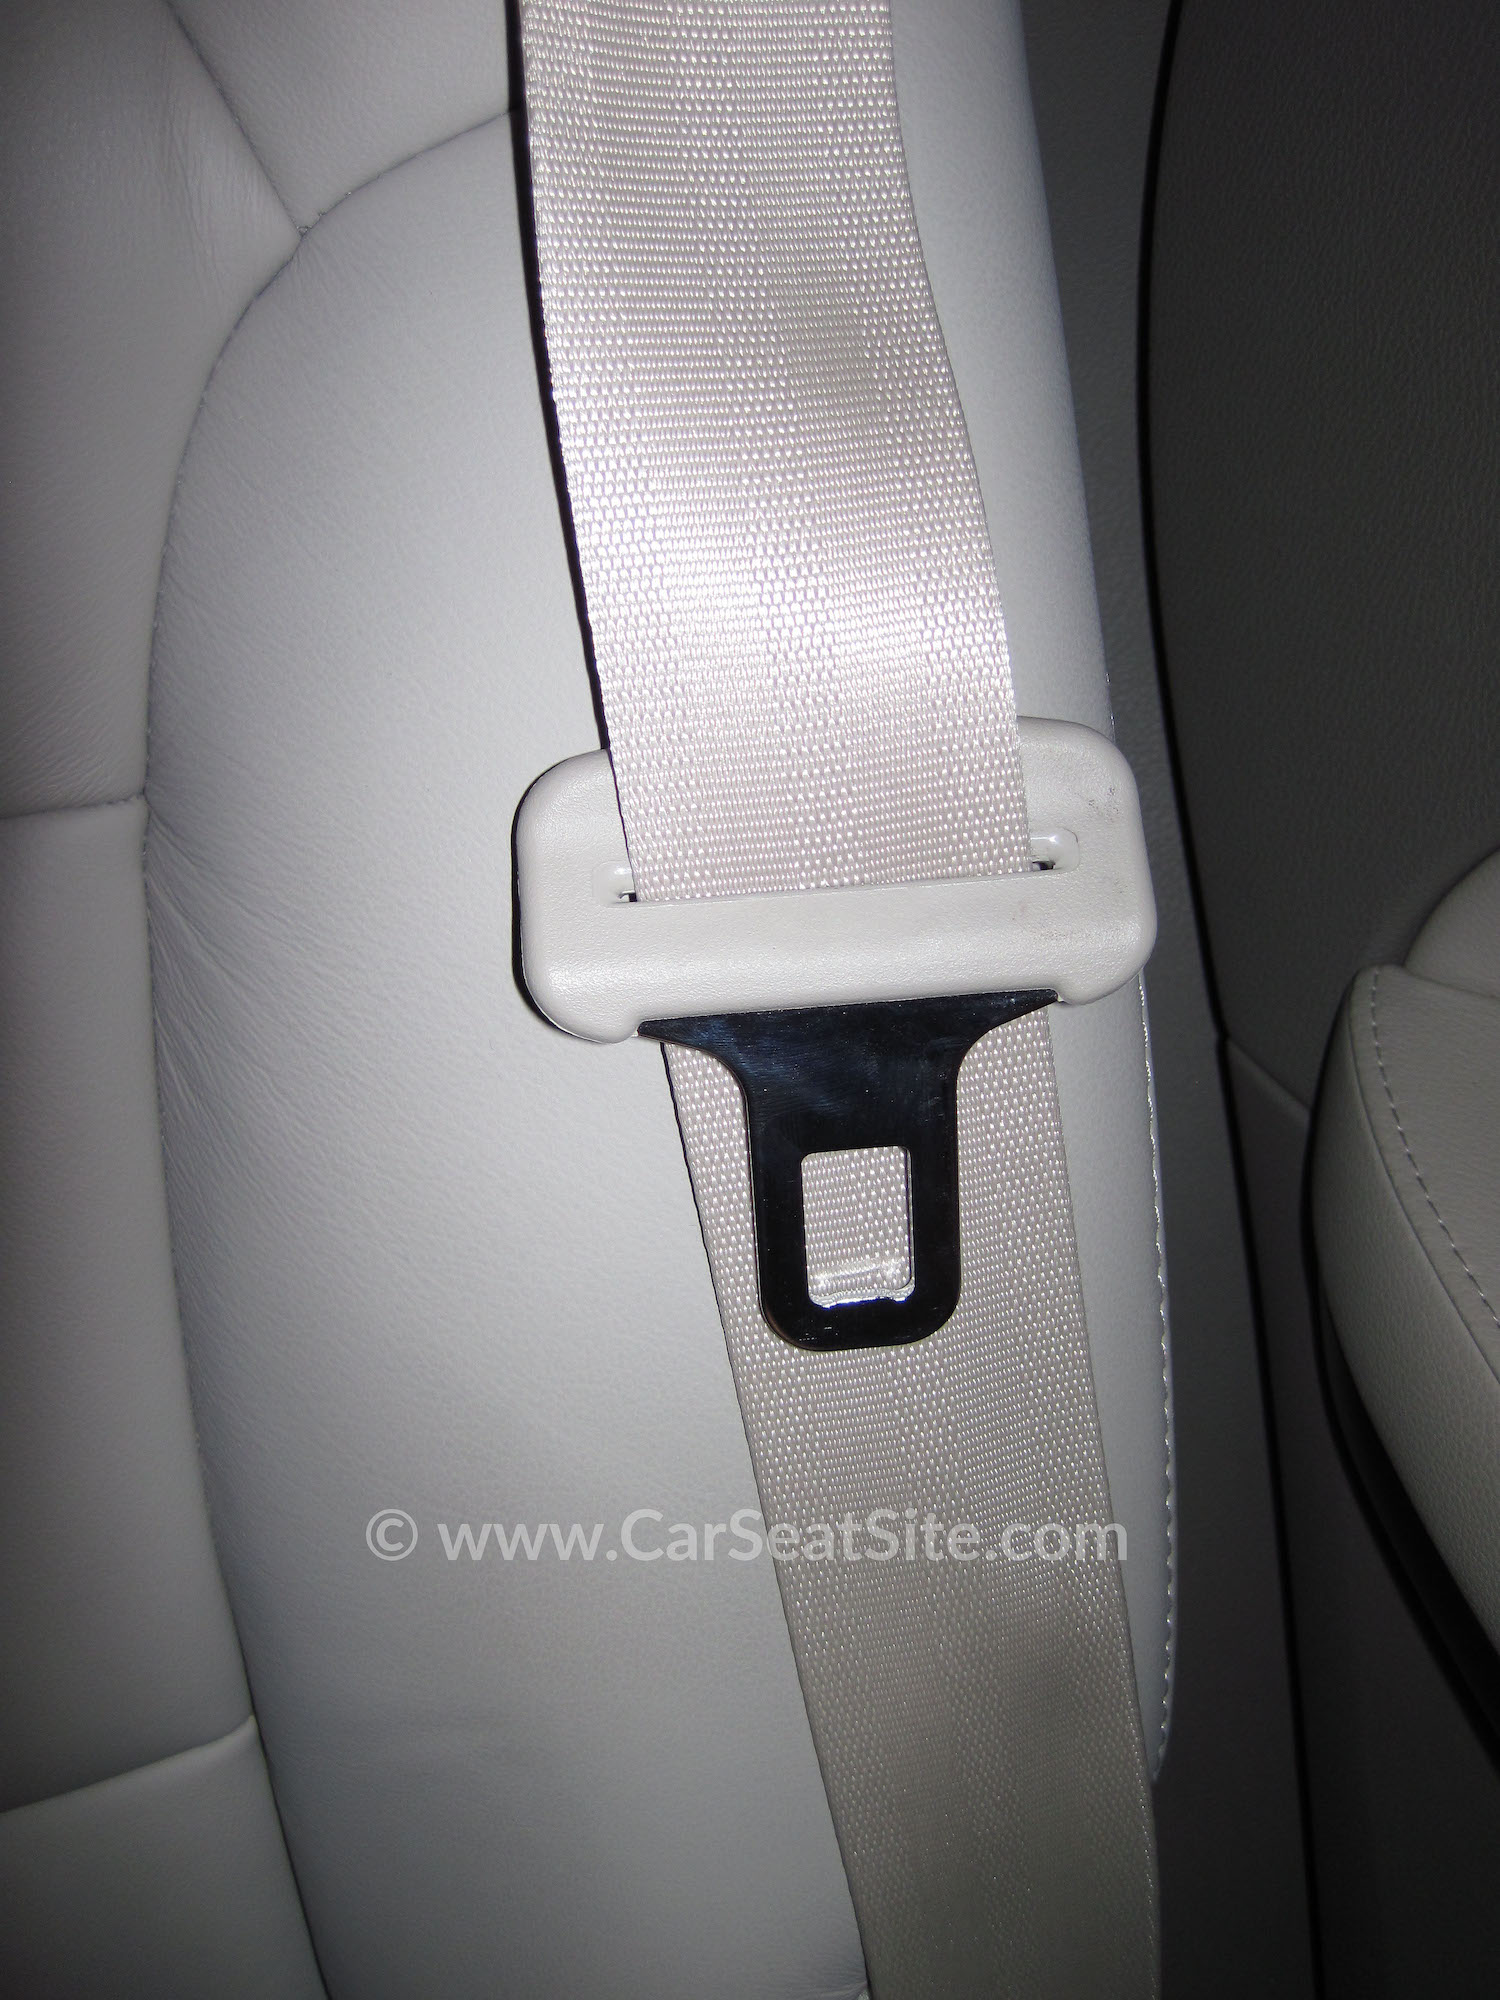
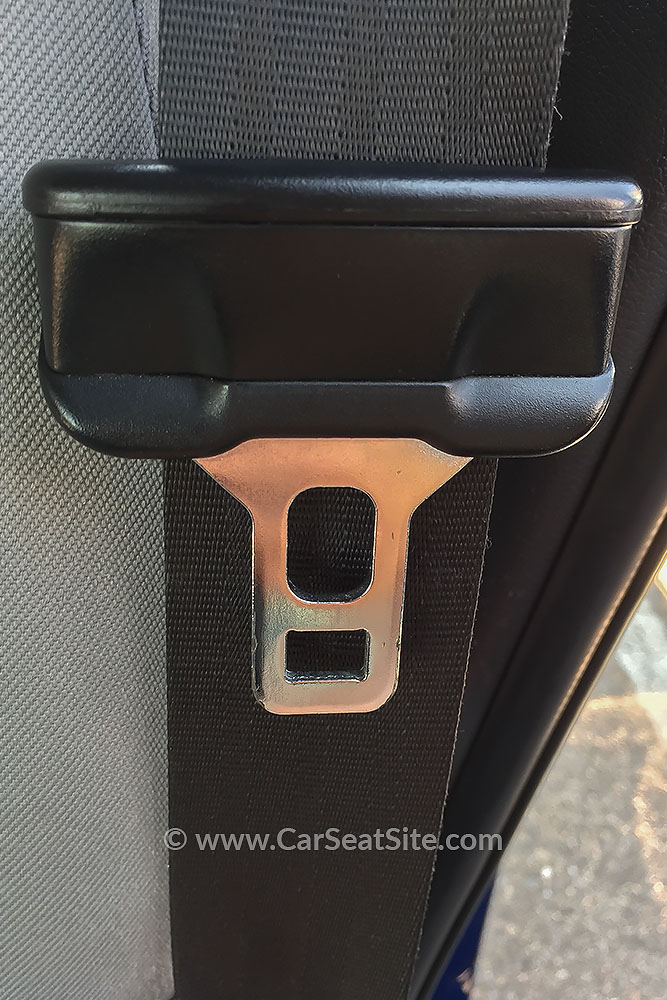
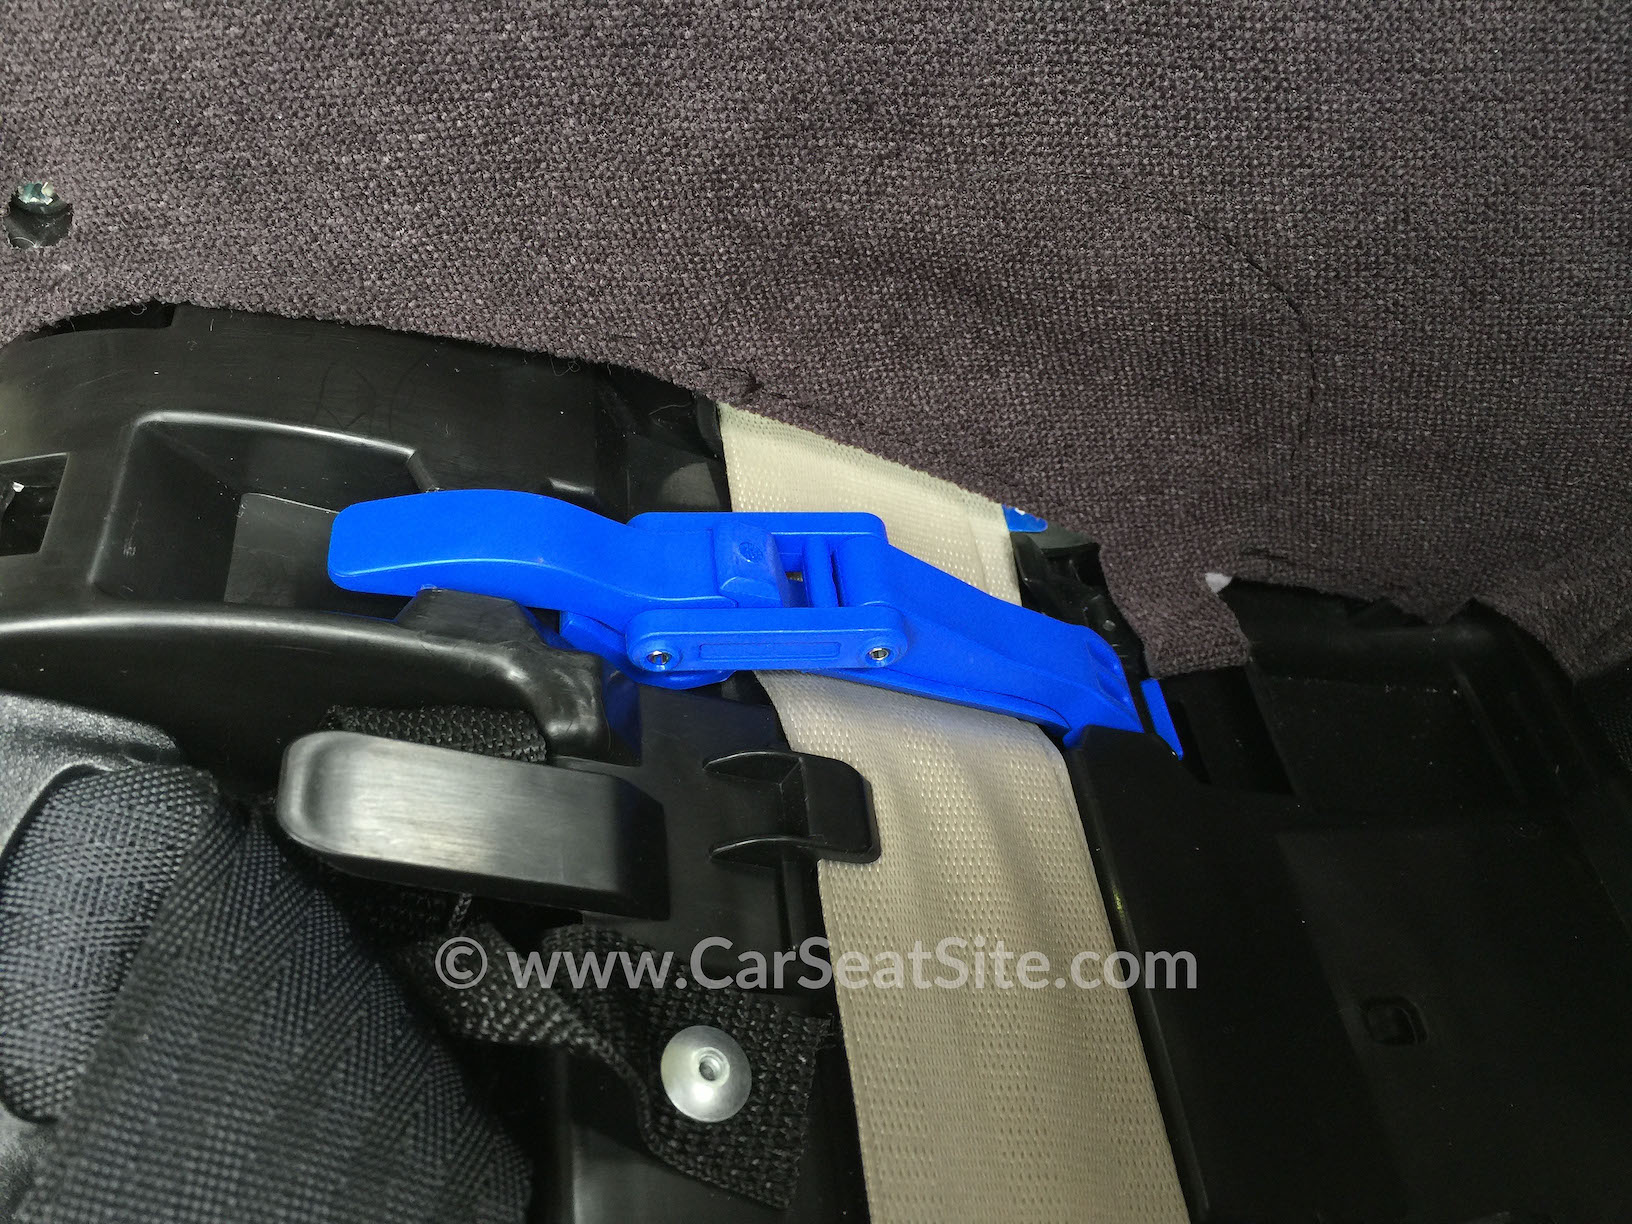
Lightweight locking (cinching) latchplate: The seat belt will move freely through this type of latchplate when the belt is at a 90 degree angle to the latchplate (covered in the Locking Your Seat Belt video above).
How Does It Work? When the latchplate lies flat against the seat belt, the lap portion of the seat belt will remain tight and locked. This type of latchplate works by a metal piece clamping or “cinching” down on top of the seat belt to hold it tight during daily driving. In the pictures below, the top piece of the latchplate moves up and down slightly.
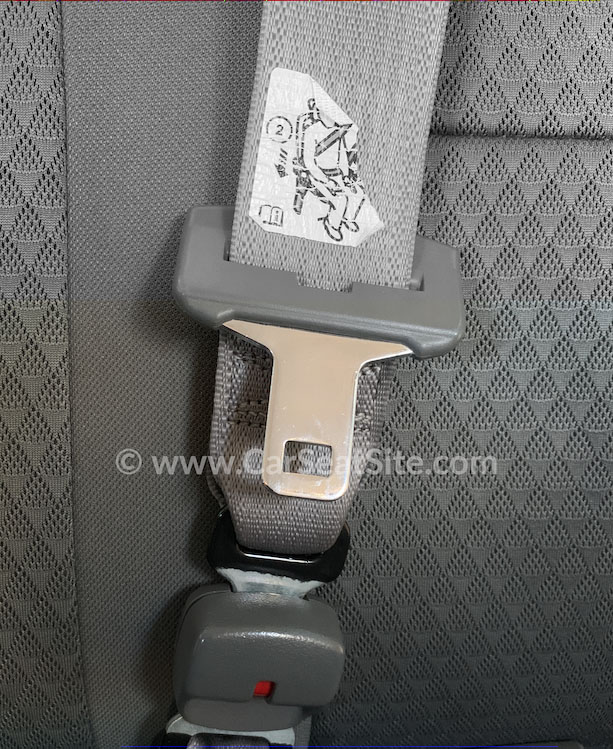
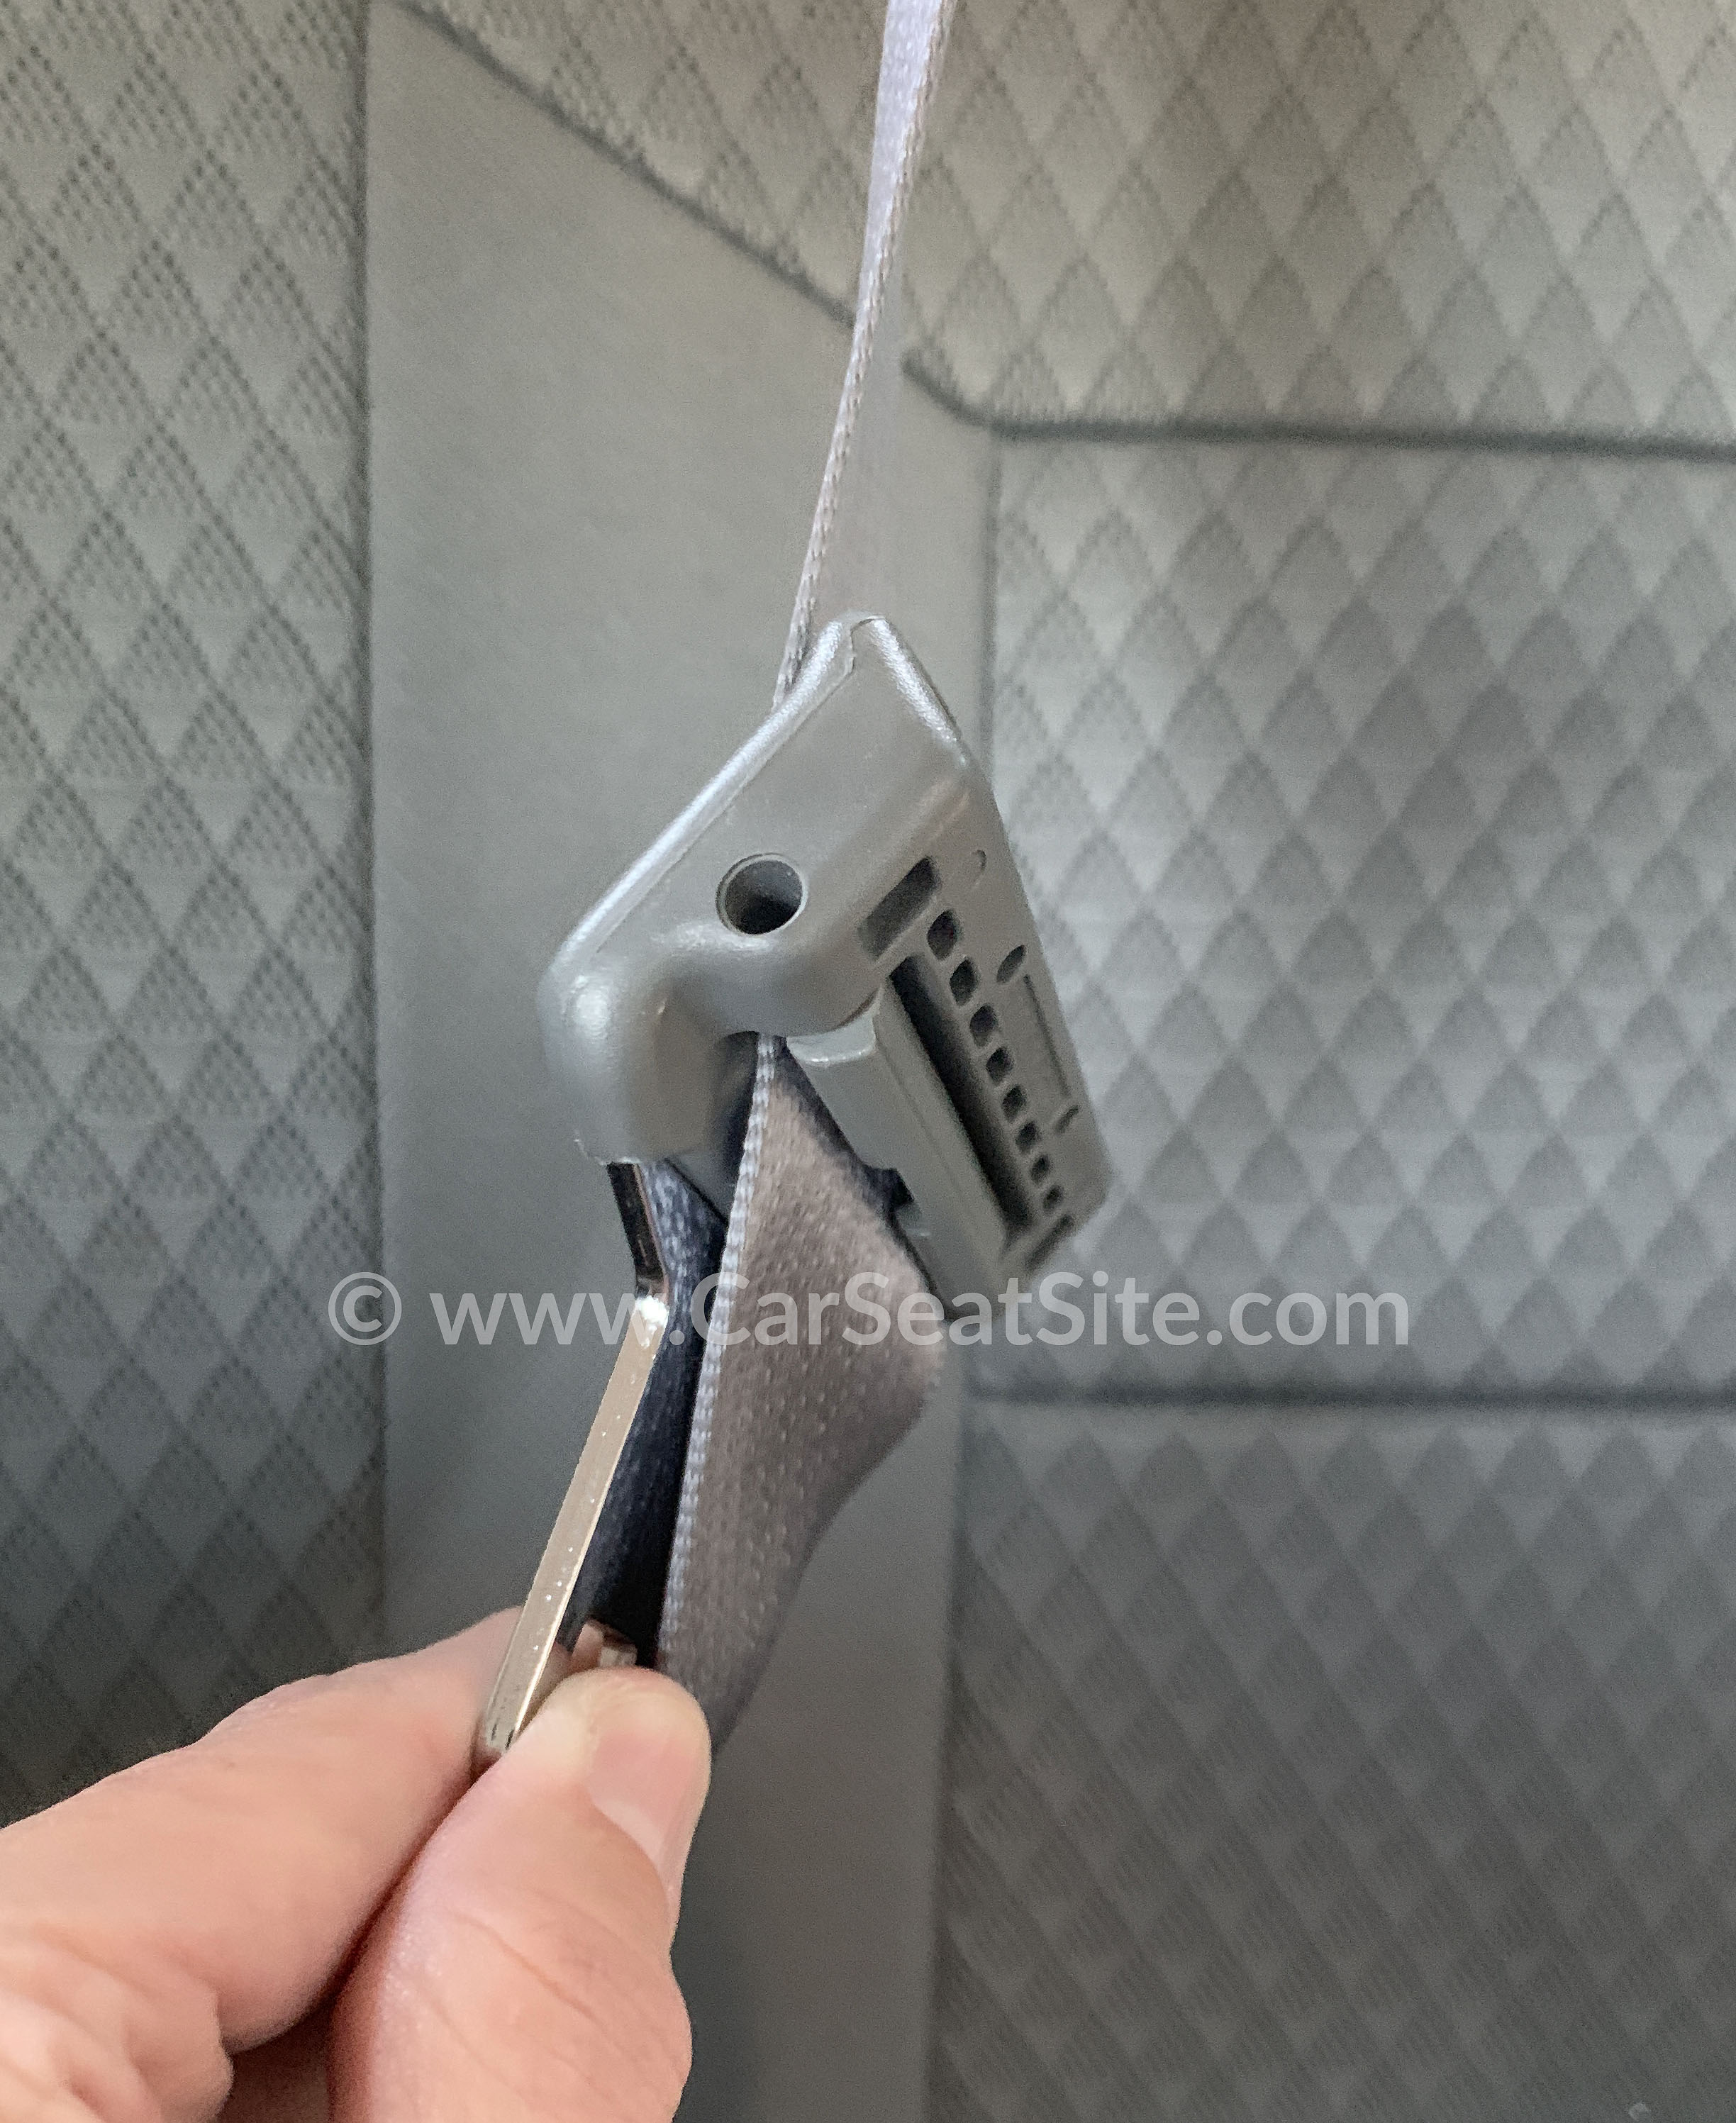

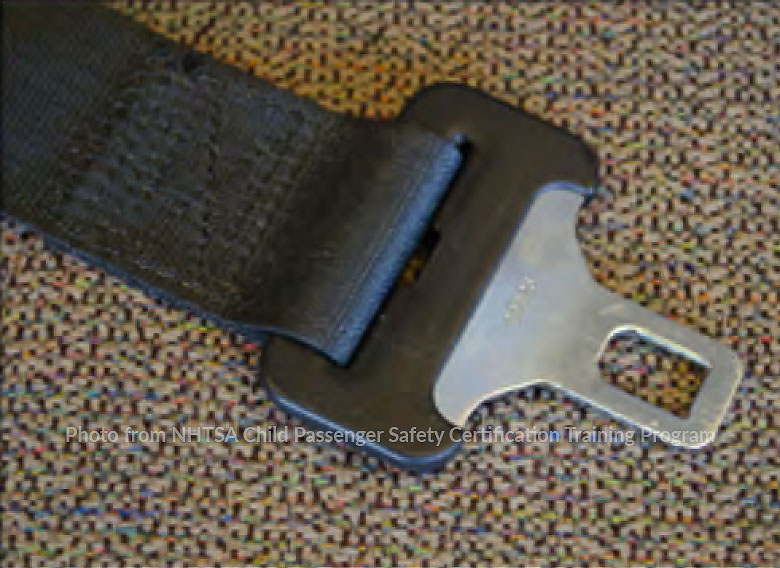
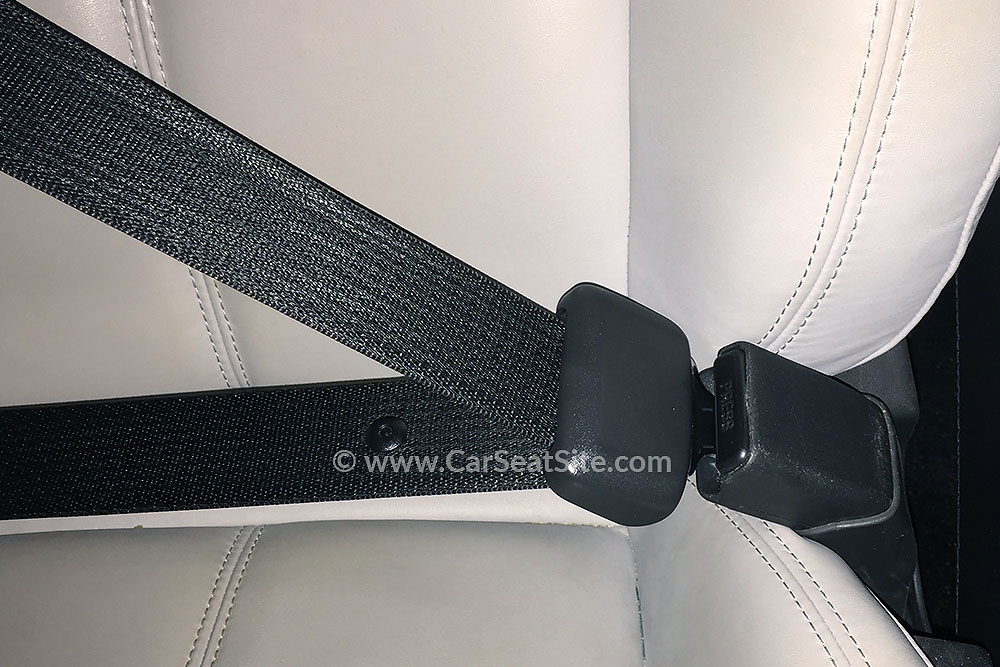
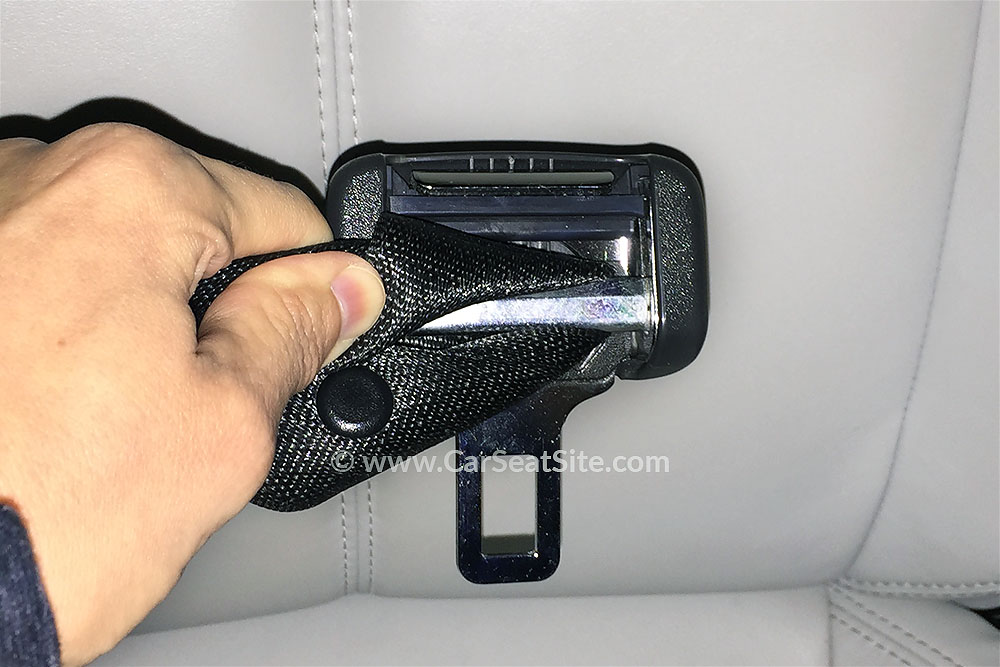
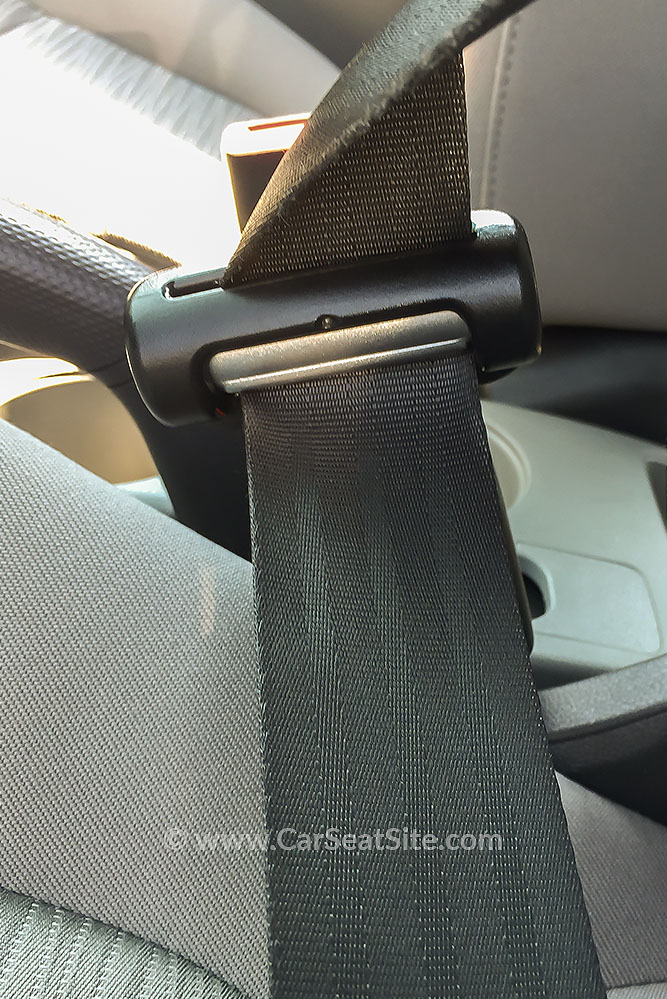
Locking latchplate: This type of latchplate is typically bulkier than a lightweight locking/cinching latchplate and is often used on lap-only belts, though it can be found on a lap/shoulder belt as well (covered in the Locking Your Seat Belt video above).
How Does It Work? A metal bar holds the seat belt webbing in position.
Switchable latchplate: This latchplate has a switch on it to engage the locking mechanism and is sometimes found in older Volvo or Saab vehicles. Read your vehicle’s manual to be certain how to use it. This is the least common type of latchplate.

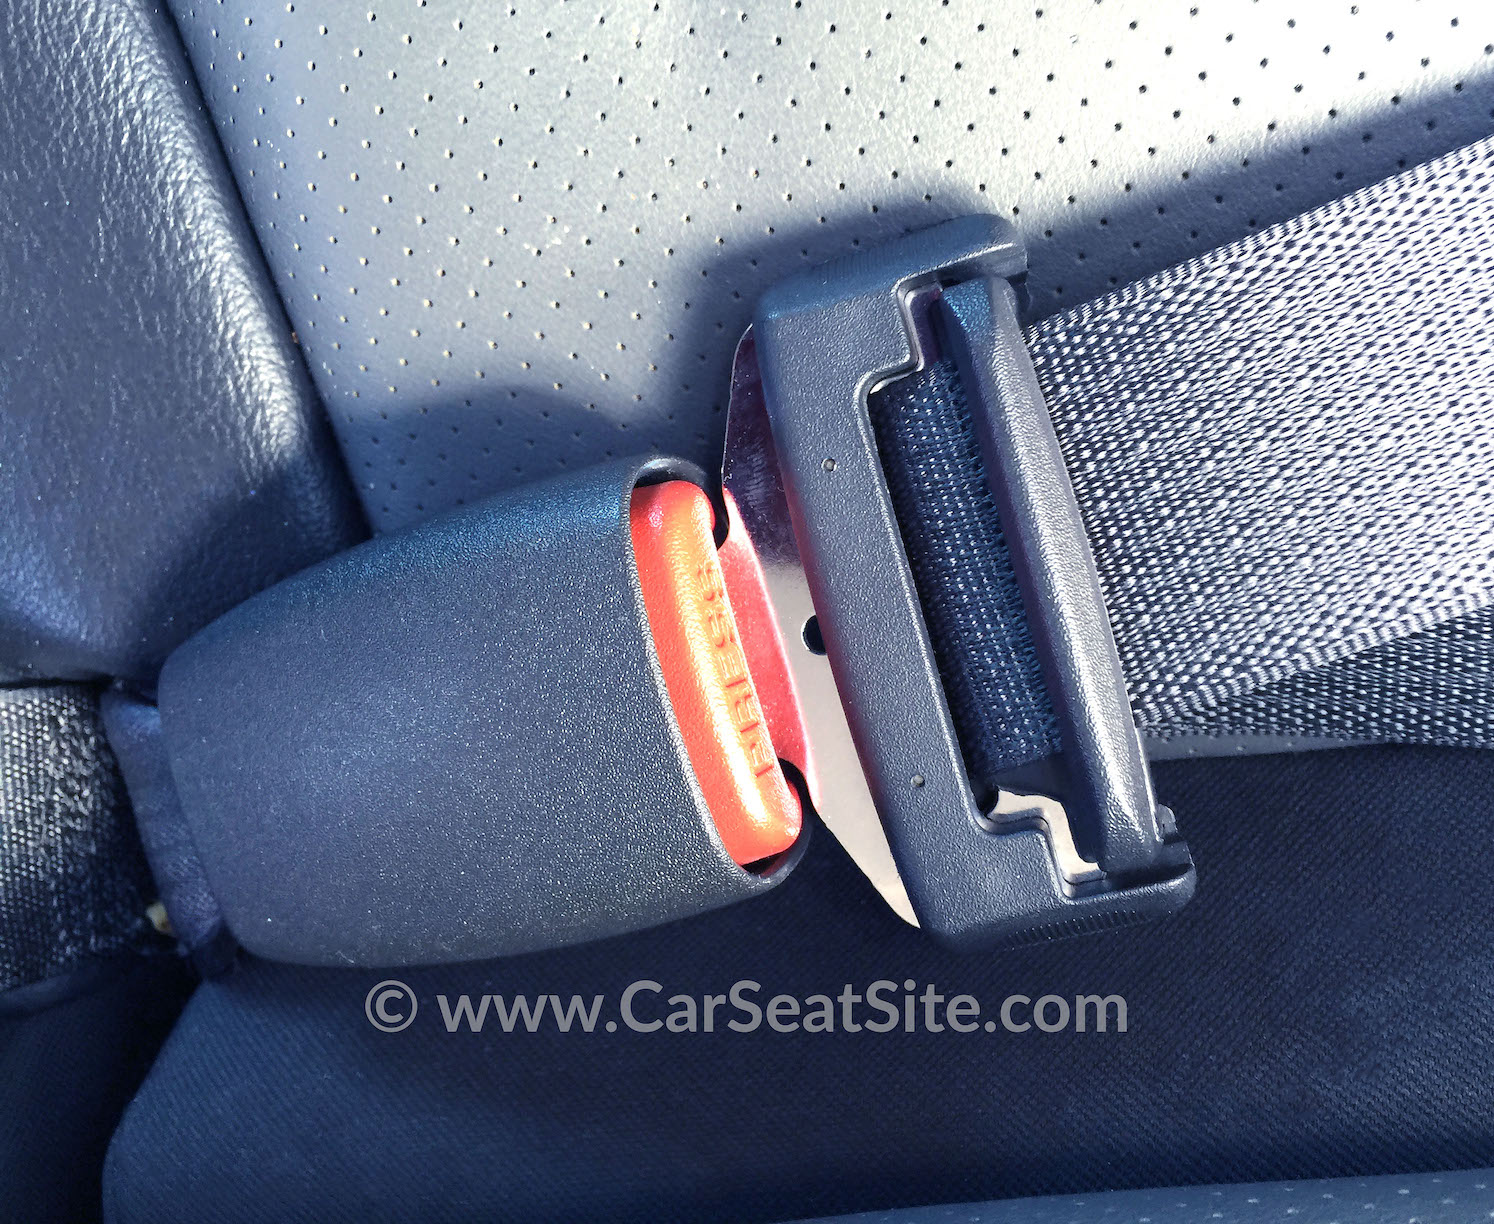
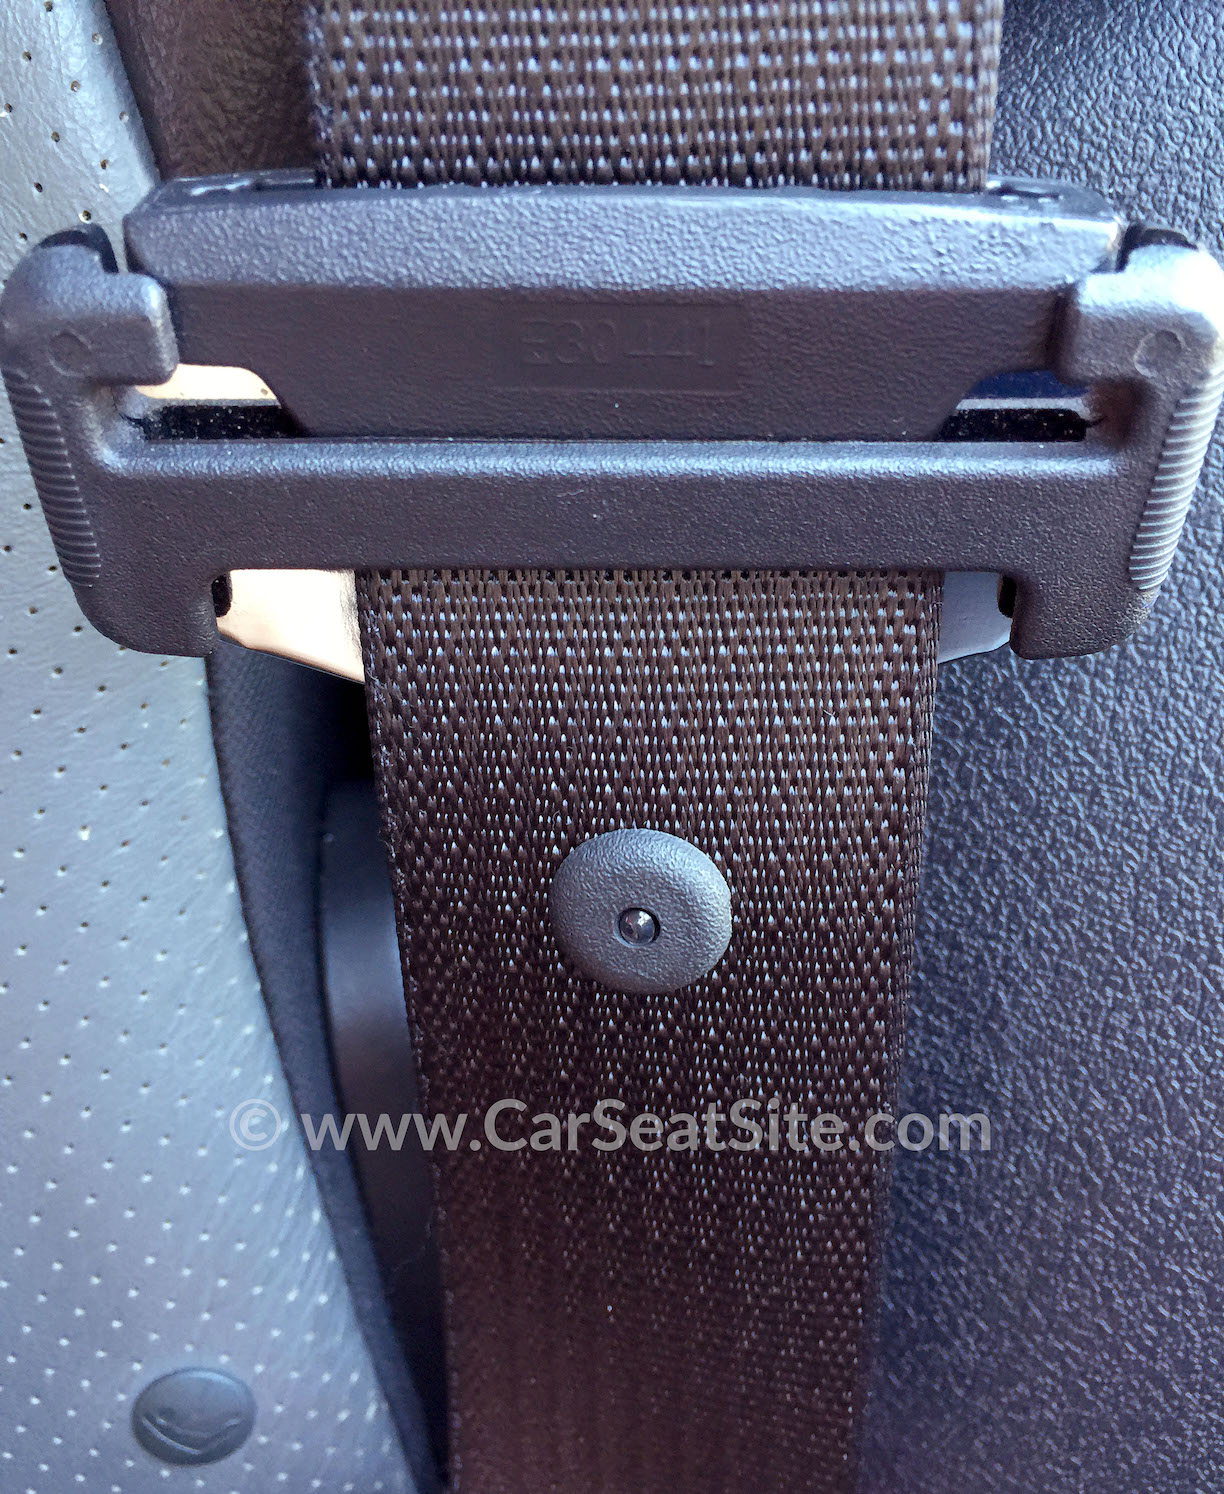
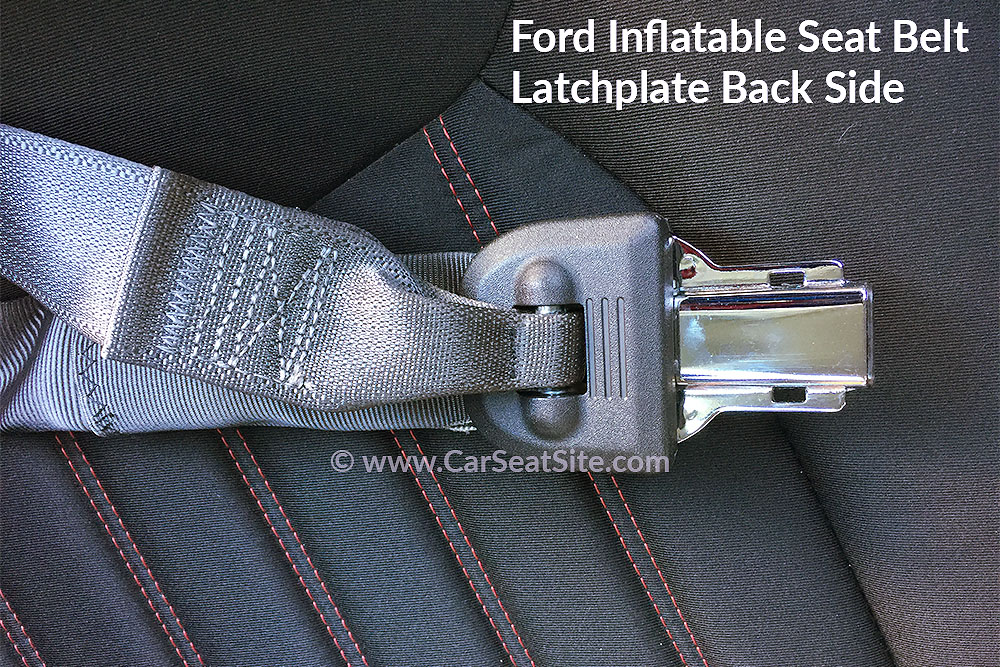
Sewn-on latchplate: This latchplate is sewn to both the lap belt and the shoulder belt; it can also be on a lap-only belt. Found on inflatable seat belts located in Ford Motor Company vehicles. If you have a sewn-on latchplate on a lap/shoulder belt, focus on the lap belt, since it is separate from the shoulder belt and it is what will be doing the restraining of the carseat. If this lap belt does not lock, you will need to use a belt-shortening clip. Please consult a certified child passenger safety technician who will show you where to purchase this specialized clip and will show you how to safely install this on a seat belt. A belt-shortening clip is not for the inexperienced. The lap portion of the Ford inflatable seat belts have a switchable retractor so they can be easily locked without a belt-shortening clip.

Non-Locking Latchplates
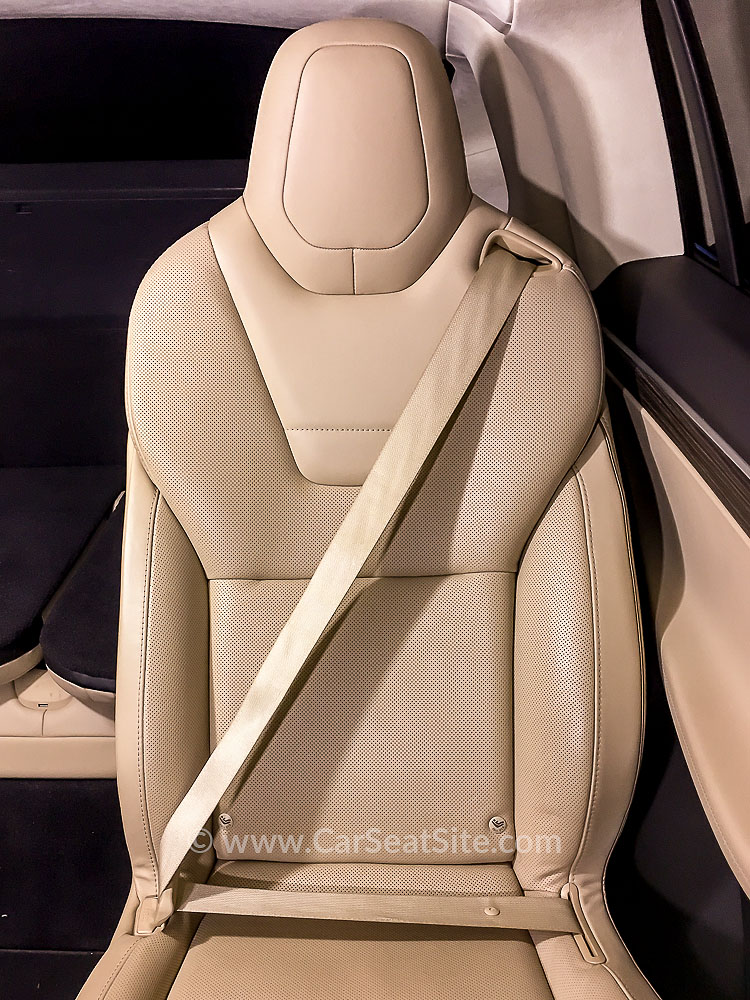
Sliding latchplate:
This is probably the most common type of latchplate in modern vehicles. You will need to lock your seat belt at its switchable retractor to install a carseat.
How Does It Work? It is found on every driver’s seat belt and on most vehicle belts throughout most vehicles. It simply slides up and down on the seat belt with no means of locking the seat belt.
Dynamic locking latchplate: Locking in name only, this newer type of latchplate looks very much like a regular locking latchplate, but it does not hold the seat belt tight during daily driving (covered in the Locking Your Seat Belt video above).
How Does It Work? Dynamic locking latchplates are designed to improve outcomes for occupants by holding the lap portion of the belt tight during a frontal crash only and reducing the chances of submarining under the belt. These latchplates are currently found mostly in front seat positions, but are in some back seats of Chevrolet trucks. Seat belts with dynamic locking latchplates will also have switchable retractors since the latchplate will not hold a carseat tight. In the rare event you must install a carseat in the front passenger seat, do not depend on the latchplate to hold the seat belt tight; lock the retractor. Your vehicle manual will tell you if you have this type of latchplate and how to lock the seat belt for carseats.
Do You Need A Locking Clip?
Yes, I Need A Locking Clip
My lap/shoulder seat belt does not lock automatically.
TEST TO SEE IF YOUR LAP/SHOULDER BELT RETRACTOR LOCKS:
- Slowly pull the shoulder portion of the belt all the way out from the retractor.
- Slowly let the belt feed back into the retractor about 12″.
- Does it make a ratcheting/clicking sound* and NOT let you pull excess belt back out of the retractor?
- Yes? It locks and you do NOT need a locking clip. This type of seat belt has a switchable retractor, because it switches between locking only on sudden braking/impact (ELR) and staying locked. To unlock a switchable retractor, unbuckle it and feed it all the way back into the retractor.
- No? Your seat belt does not lock and you MUST use a locking clip.
*Not all switchable seat belts will make a ratcheting/clicking sound when retracting or you may not hear it.
The locked mode is the seat belt mode you use to install carseats. Be careful not to jerk the seat belt when testing to see if it locks. Some ELRs will lock the seat belt if you yank the belt. This may lead you to believe that your belt automatically locks when, in reality, it does not. Read your vehicle’s manual or the label on the seat belt to be certain what kind of seat belts you have. Some retractors may also have a switch to lock them.
**The lap/shoulder belt for the driver has an ELR.** You can use this seat belt to test against the rest of the retractors in your vehicle to see if they lock. Remember, yanking on the belt may cause it to lock and confuse you into thinking that the seat belt is locked when it actually is not. The driver’s shoulder belt on middle 1970s and newer vehicles should have ELRs.
I have a sliding latchplate on my lap/shoulder belt and my seat belt does not lock automatically.
Was your vehicle made before 1996? That is the model year when locking seat belts were required in vehicles (called the Lockability Standard), so if your vehicle is 1996 or newer, you should not need a locking clip. Remember, the latchplate is the silver metal piece (male end) that goes into the buckle (female end). If it slides freely, no matter what angle you pull it at, it is a sliding latchplate. Use the above test to see if your seat belt locks automatically. *Note: some lightweight locking (cinching) latchplates resemble a sliding latchplate. Check your vehicle’s manual or the label on the seat belt to verify what kind of seat belt you have.
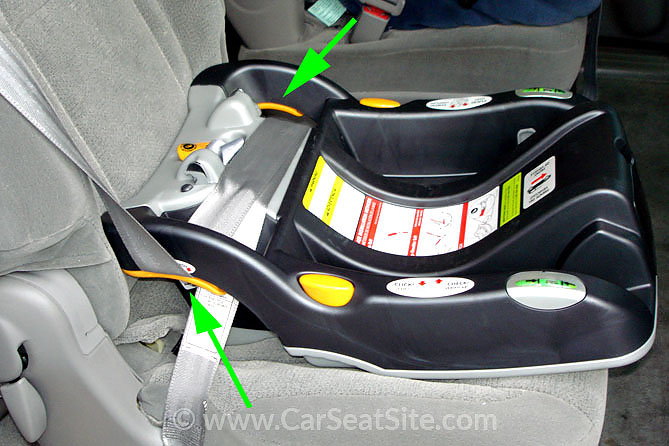
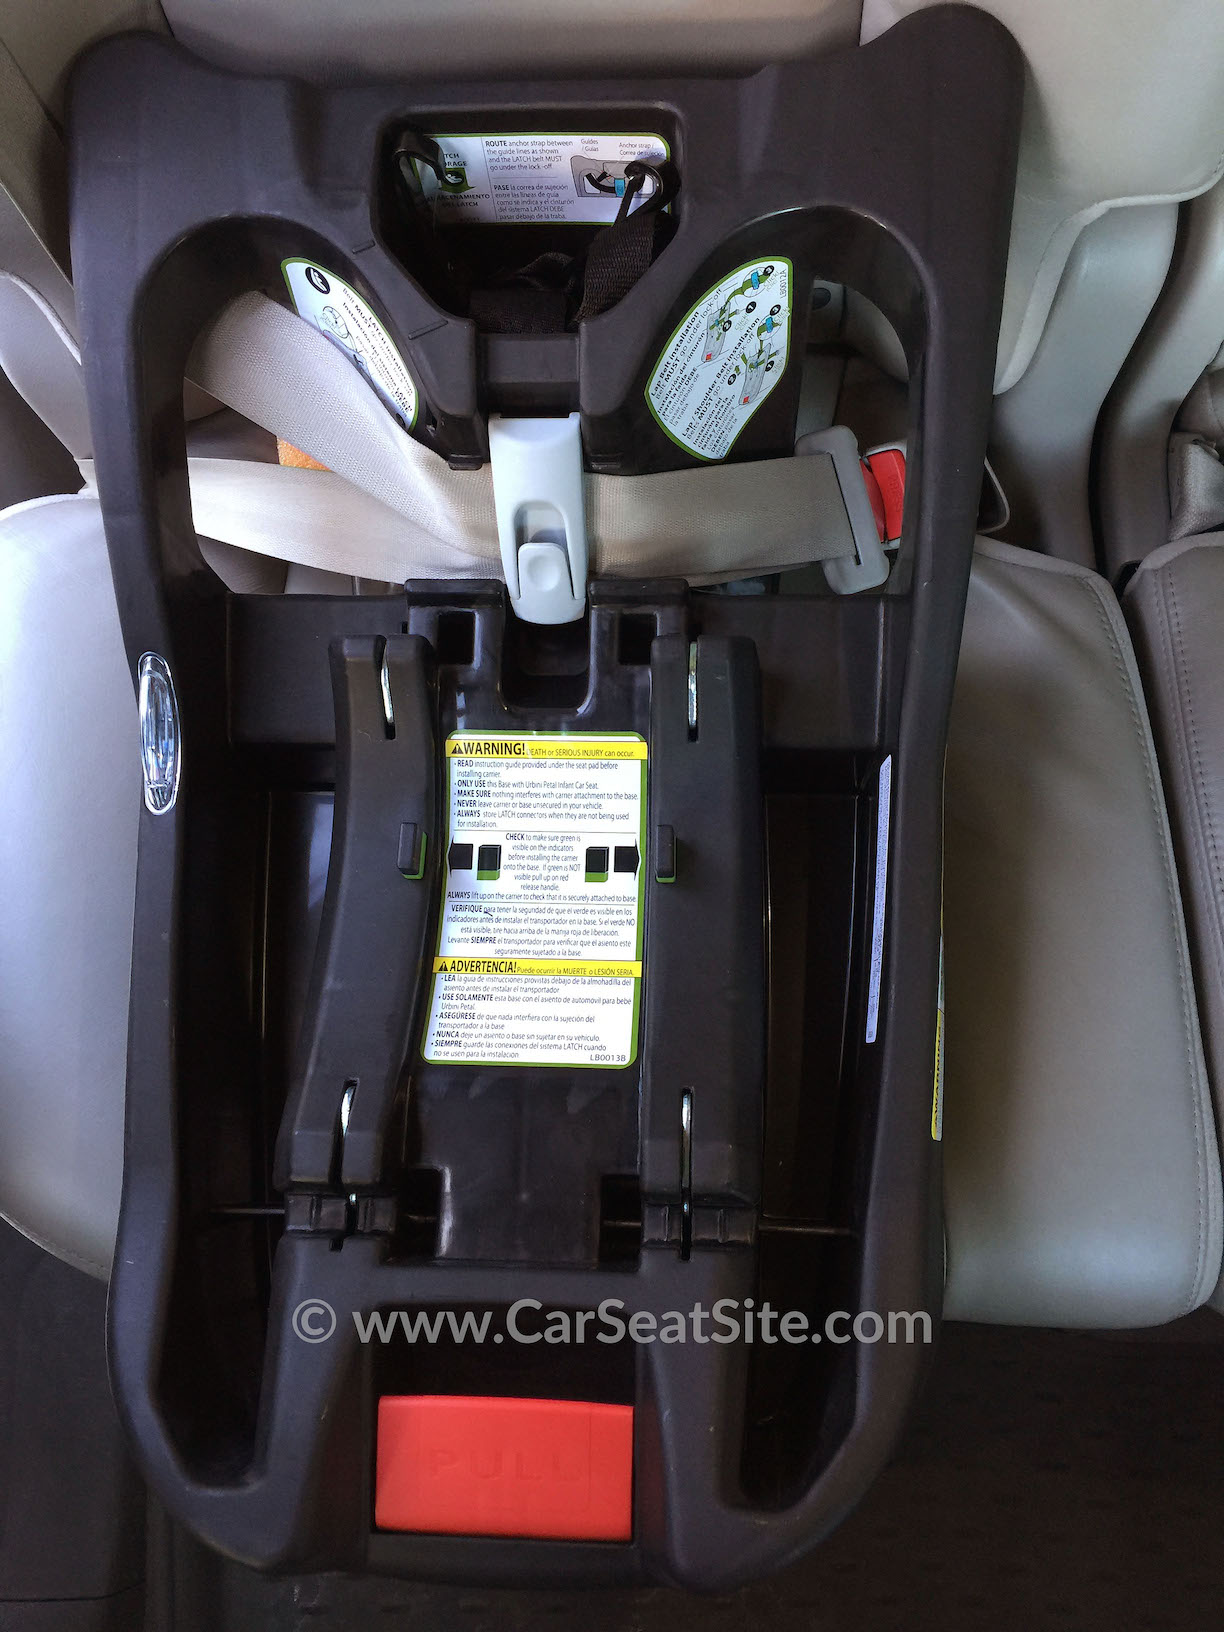
My lap/shoulder seat belt locks automatically, but pulls a rear-facing carseat up on one side.
This is only a problem with rear-facing seats. The shoulder portion of the seat belt, when the belt is pulled tight and locked, pulls up on one side of the carseat or infant seat base. To have the carseat or base sit flat on a vehicle’s seat, simply do not lock the seat belt and use a locking clip instead. When your child faces forward (after 2 years of age), remove the locking clip, and use your seat belt’s locking feature.
No, I Do Not Need A Locking Clip
I am using a lap-only belt.
Lap belts come in 3 varieties: they will have a locking latchplate (either regular locking or lightweight/cinching latchplate), have an ELR, or have an ALR. A locking latchplate makes it easy to install the carseat since you can simply route the lap belt through the belt path and pull the seat belt tight with the tail end. Lap-only belts with ALRs are a bit more difficult to work with; make sure to pull out enough seat belt first before routing through the belt path.
NEVER use a locking clip on a lap-only belt. A locking clip is not designed to withstand crash forces and will bend and fly off a lap-only belt in a crash, leaving the lap belt loose on the carseat. The locking clip’s job is to hold the lap portion of a lap/shoulder seat belt tight before a crash until the emergency retractor kicks in and locks the belt. Since there is no emergency retractor in a lap-only belt, there is nothing to hold it tight in a crash if the metal bar inside the latchplate is not locking the belt tight. If the lap-only belt does have an emergency locking retractor (found in a few, older model vehicles), then a special belt-shortening clip is used to avoid any slack at all in the belt during a crash. Please consult a certified child passenger safety technician who will show you where to purchase this specialized clip and will show you how to safely install this on a seat belt. This type of clip is not for the inexperienced.
If your lap-only belt with locking latchplate loosens when the carseat is installed, flip the latchplate (male end) over once and buckle. Pull on the belt to make sure it is locked. If you are using a seat belt (most often lap-only) that does not lock in any way, you may need to use a belt-shortening clip (sometimes called by its outdated term of heavy duty locking clip). Please consult a certified child passenger safety technician who will show you where to purchase this clip and will show you how to safely install this on a seat belt. This type of clip is not for the inexperienced.
My seat belt locks automatically.
My seat belt locks automatically when I pull it out more than 18″ (it locks at the retractor) or it has a locking latchplate.
I am using the carseat’s LATCH belt.
LATCH belts lock automatically—they work just like lap-only belts—eliminating the need to use a locking clip. If the LATCH belt is not staying tight, use the vehicle seat belt instead and call the carseat manufacturer to report the LATCH belt.
My carseat has built-in lockoffs.
If your carseat has a built-in lockoff, use it instead of a locking clip. The carseat manufacturer designed the carseat to be used with the lockoff, so using a locking clip may affect its performance in a crash. Be sure to follow manufacturers’ instructions closely on which lockoff to use when installing the carseat; some specify using one or both lockoffs during installation. Lockoffs come in a variety of designs from simple slide-ins to clamp styles.
Belt-Shortening Clip
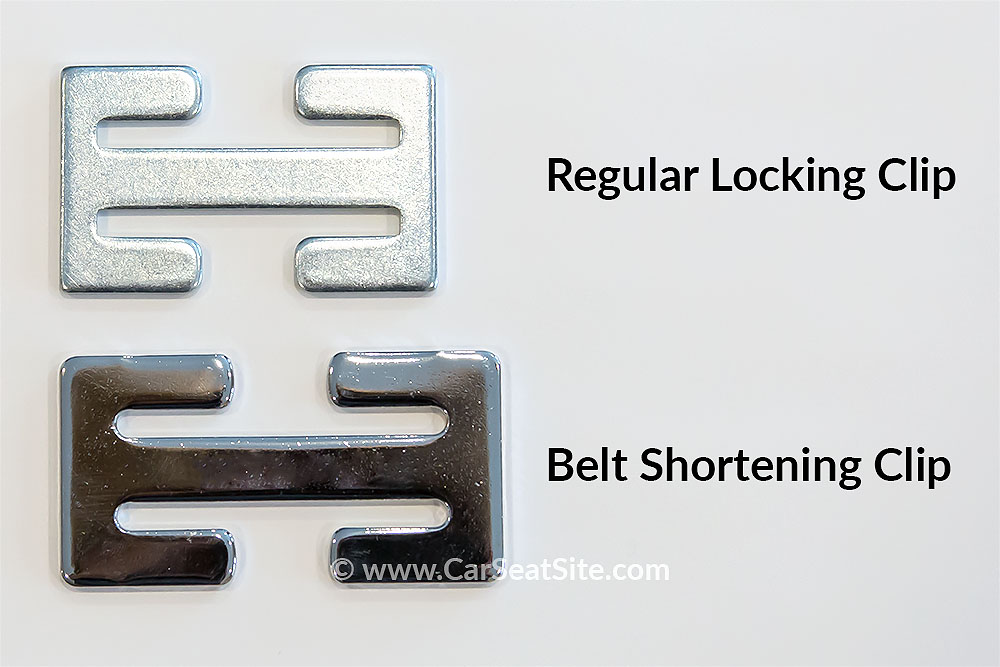 As was mentioned earlier, a belt-shortening clip is a specialized tool designed for specific circumstances. Instead of locking the seat belt as a locking clip does, it takes the place of the retractor; therefore, it is placed on the seat belt differently. Because it is acting as a locking retractor, it is made of a stronger metal than a locking clip and is considered an auto part and must be bought from vehicle dealers. Locking clips CANNOT be used as belt-shortening clips! If you have a vehicle with sewn-on latchplates and ELR retractors or a broken retractor and must install a carseat in that position, contact an experienced child passenger safety technician in your area for guidance.
Installing A Locking Clip
Only use a locking clip if you have tried everything else to get your lap/shoulder seat belt locked and it will not stay locked. Locking clips are not dangerous to use unless you install them incorrectly, but they are challenging to install and may take you two or three times to get on the belt correctly.
Use a lap/shoulder belt only.
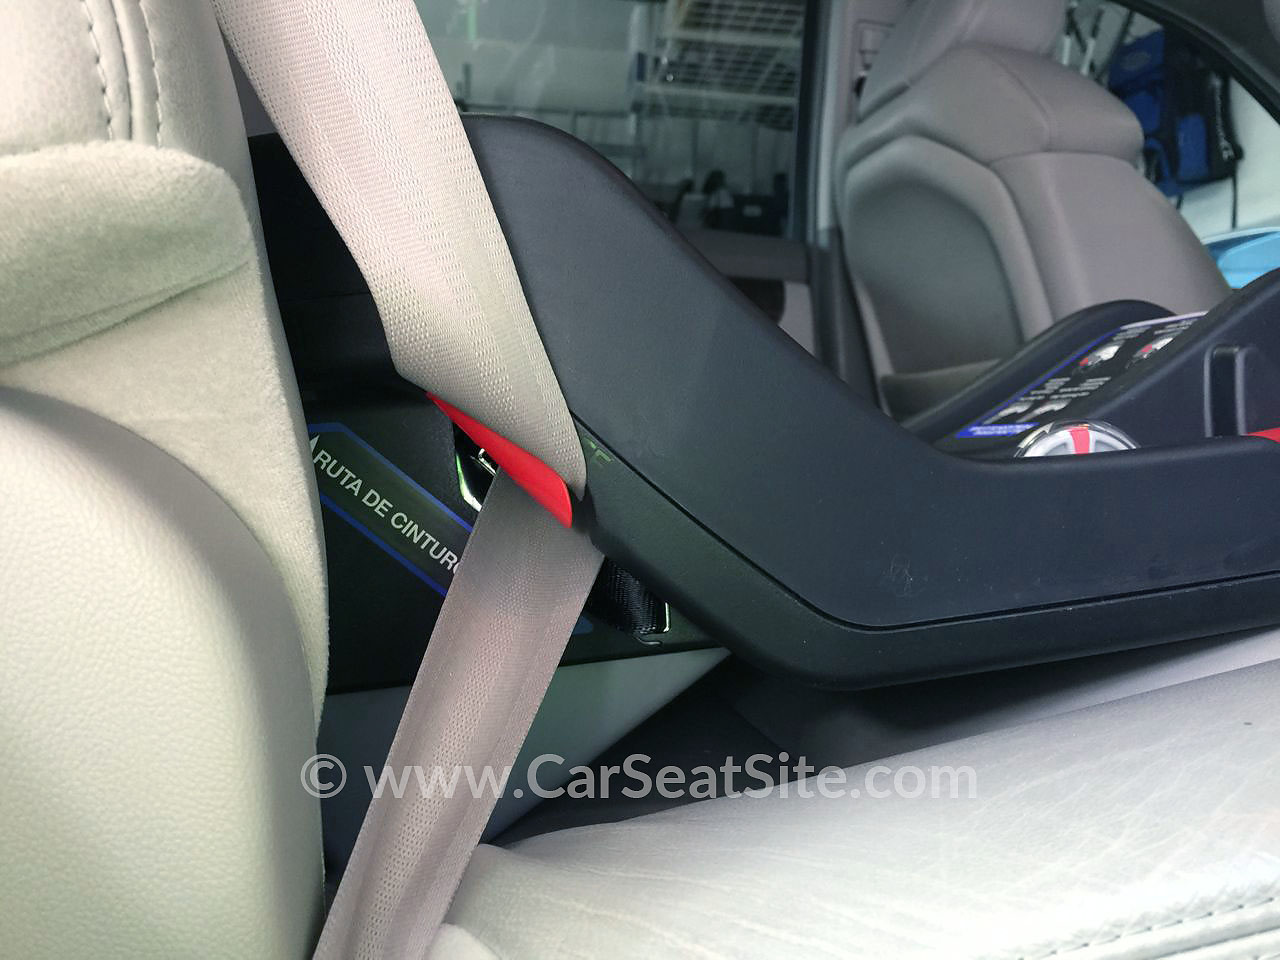
Feed the lap/shoulder belt through the appropriate belt path on the carseat (generally, the belt path on a rear-facing seat is under the seating area of the carseat, while the belt path for a forward-facing seat is behind the back of the carseat).
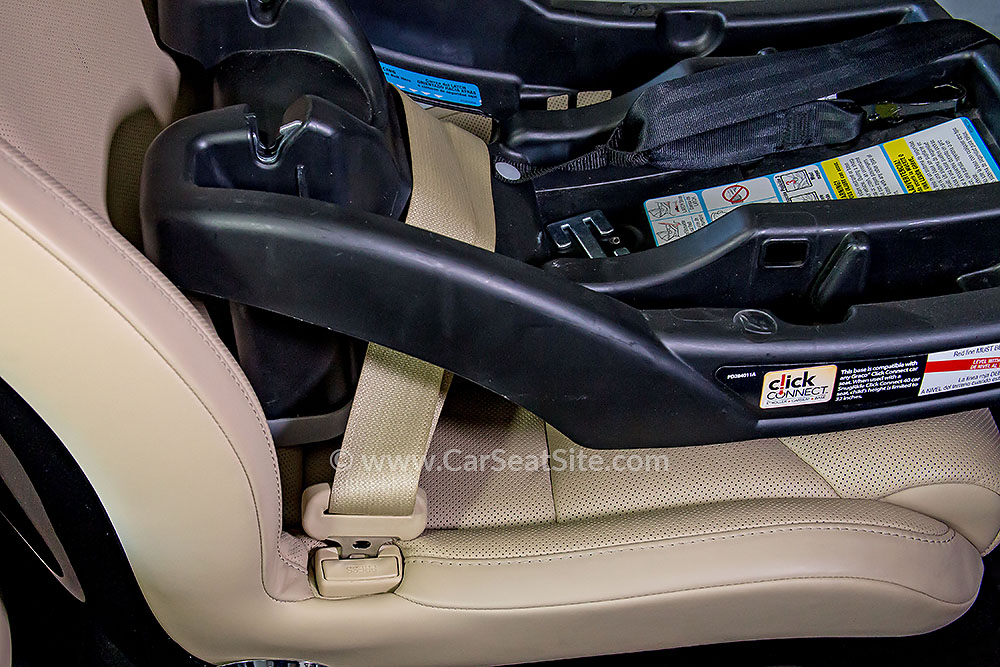
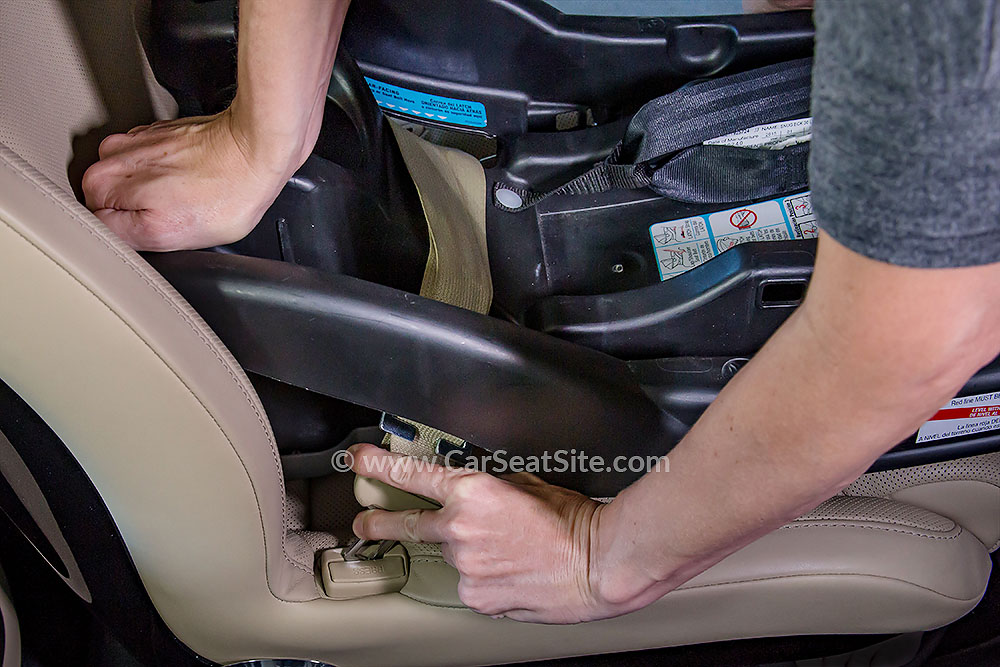
Buckle the seat belt in and pull the shoulder portion tight. It is easier if you have a helper do this while you press down on the seat with your hand.
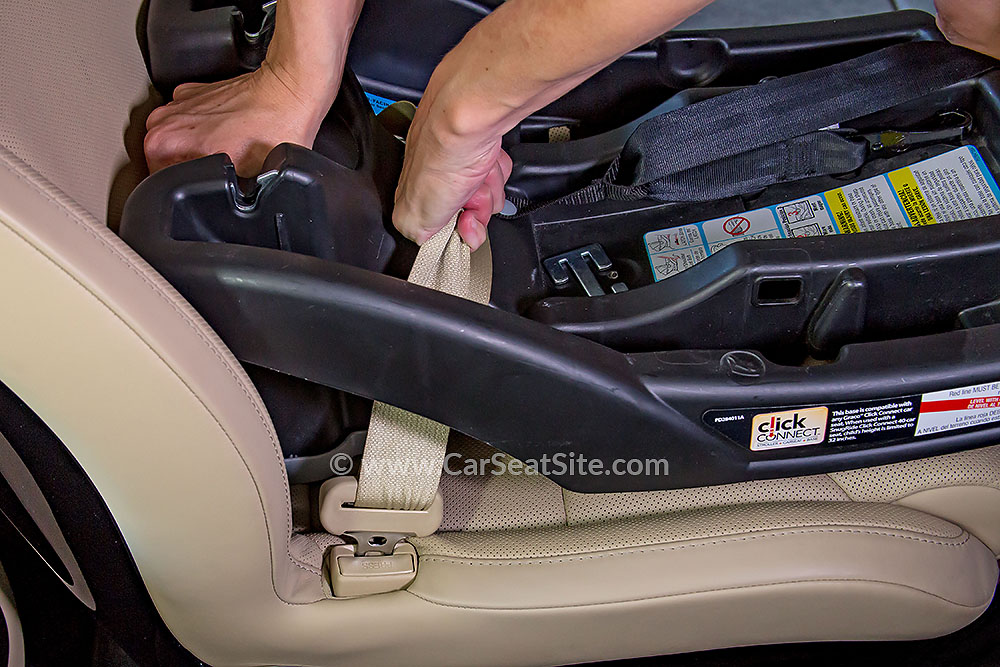
Once the belt is pulled tight, grasp both the lap and shoulder portions of the belt right next to the latchplate and hold on tight.
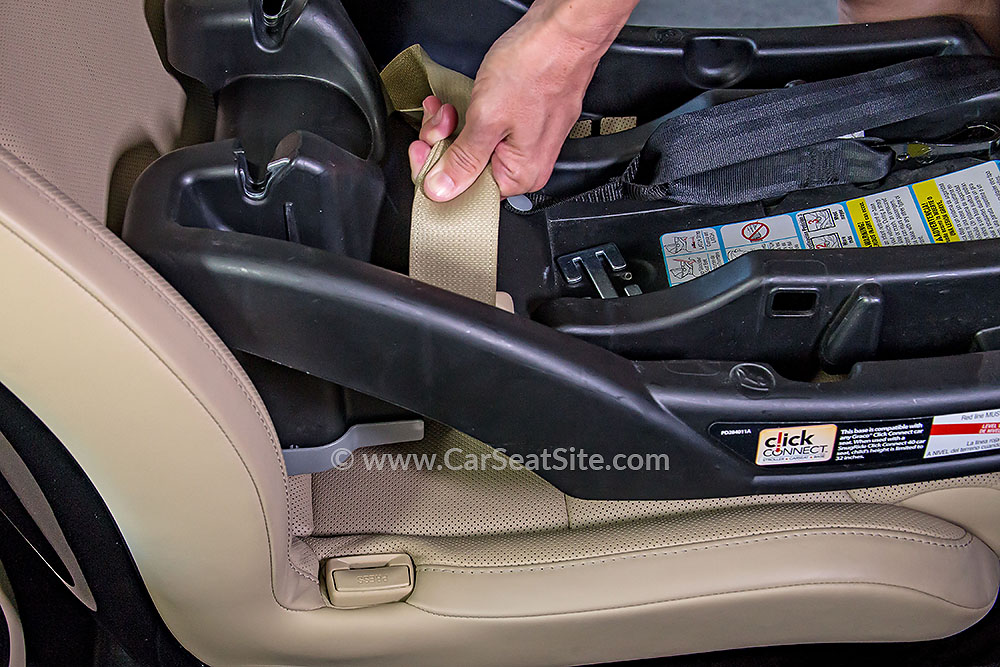
Unbuckle the belt while still holding onto the belt next to the latchplate. You may find it easier to mark the seat belt with a piece of chalk or a pencil. If you do this, be sure to mark both sides of the belt so you can tell if you have accidentally loosened it.
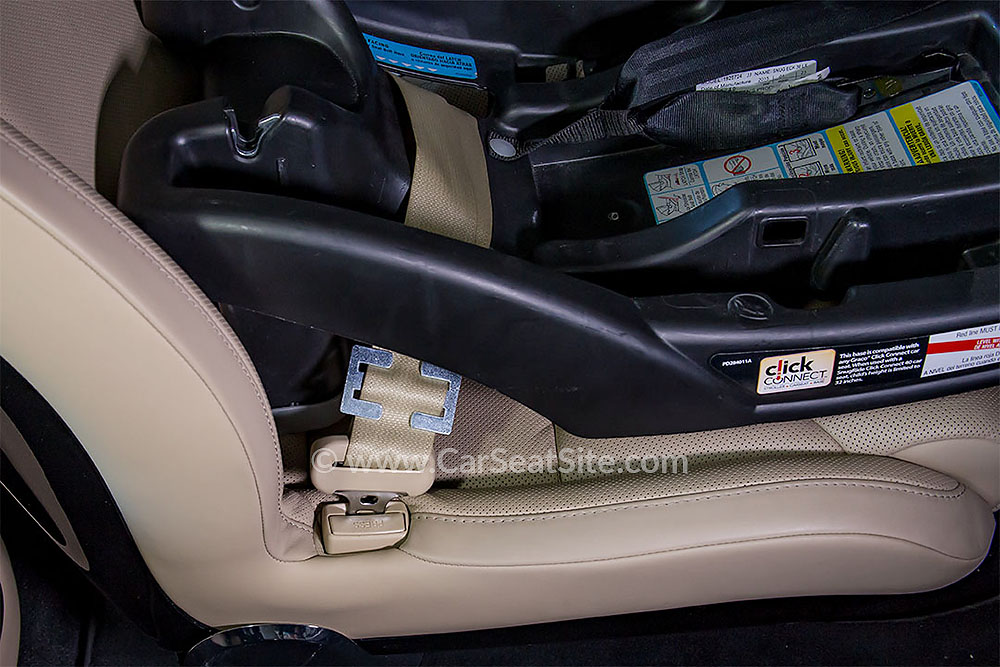
Attach the locking clip, making sure that both the lap portion and shoulder portion of the seat belt are threaded through the clip. The locking clip should go right next to the latchplate, no more than 1″ away from the latchplate. An easy way to thread the seat belt through the clip is to fold the seat belt in half lengthwise.
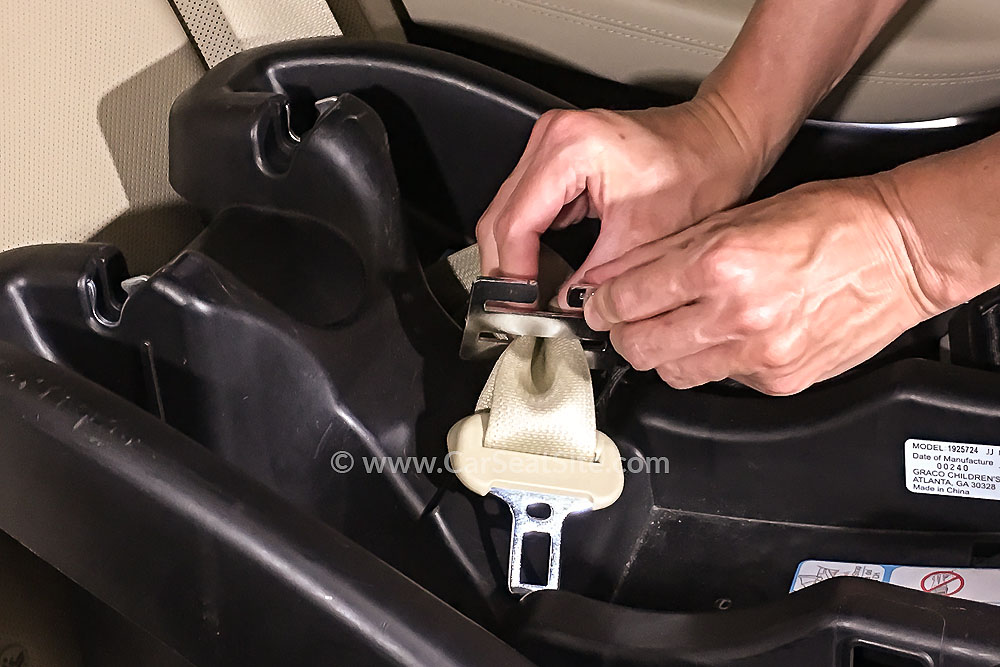
Slide one side of the locking clip over the folded portion of the seat belt and let the seat belt lay flat again (be sure not to let go of the seat belt; you do not want to gain any slack in the belt at all). Repeat for the other side of the locking clip, see first picture below. *Note: it is easier if you practice this first on a loose seat belt. Once the locking clip is securely on the seat belt, buckle the seat belt again. It should not be easy to buckle; if it is, you will most likely have to tighten the belt again and redo the locking clip. If the carseat gets in the way of the locking clip, you may move the locking clip further away from the latchplate, but it still MUST stay as close as possible to the latchplate (the further away from the latchplate you move the locking clip, the more slack is introduced into the seat belt).

Inspect the locking clip to be sure that all 4 prongs of the locking clip are securely on the seat belt. There is no right side up for a locking clip; just make sure it is all the way on both sides of the seat belt.